Using Postman with the API
As part of our new API developer engagement, we created a Postman collection to share, sync and collaborate with developers using our API.
What is Postman?
Postman is a tool that helps generate and test API calls by providing a clean interface to build and save HTTP requests, and to check and test the API responses. To get started with Postman, download the native application here.
Envizage created a set of basic starter workflows which can be used to get started with the API.
Prerequisites
Create a developer account in the Developer Console.
Step 1: Download the Envizage Basic Workflow
Step 2: Configure The Postman Environment
Before sending a request from the API, a Postman Environment needs to be created, which is a way to store and use variables between your API calls.
To create a new Environment in Postman, click New and select Environment, enter a name (eg. Envizage).
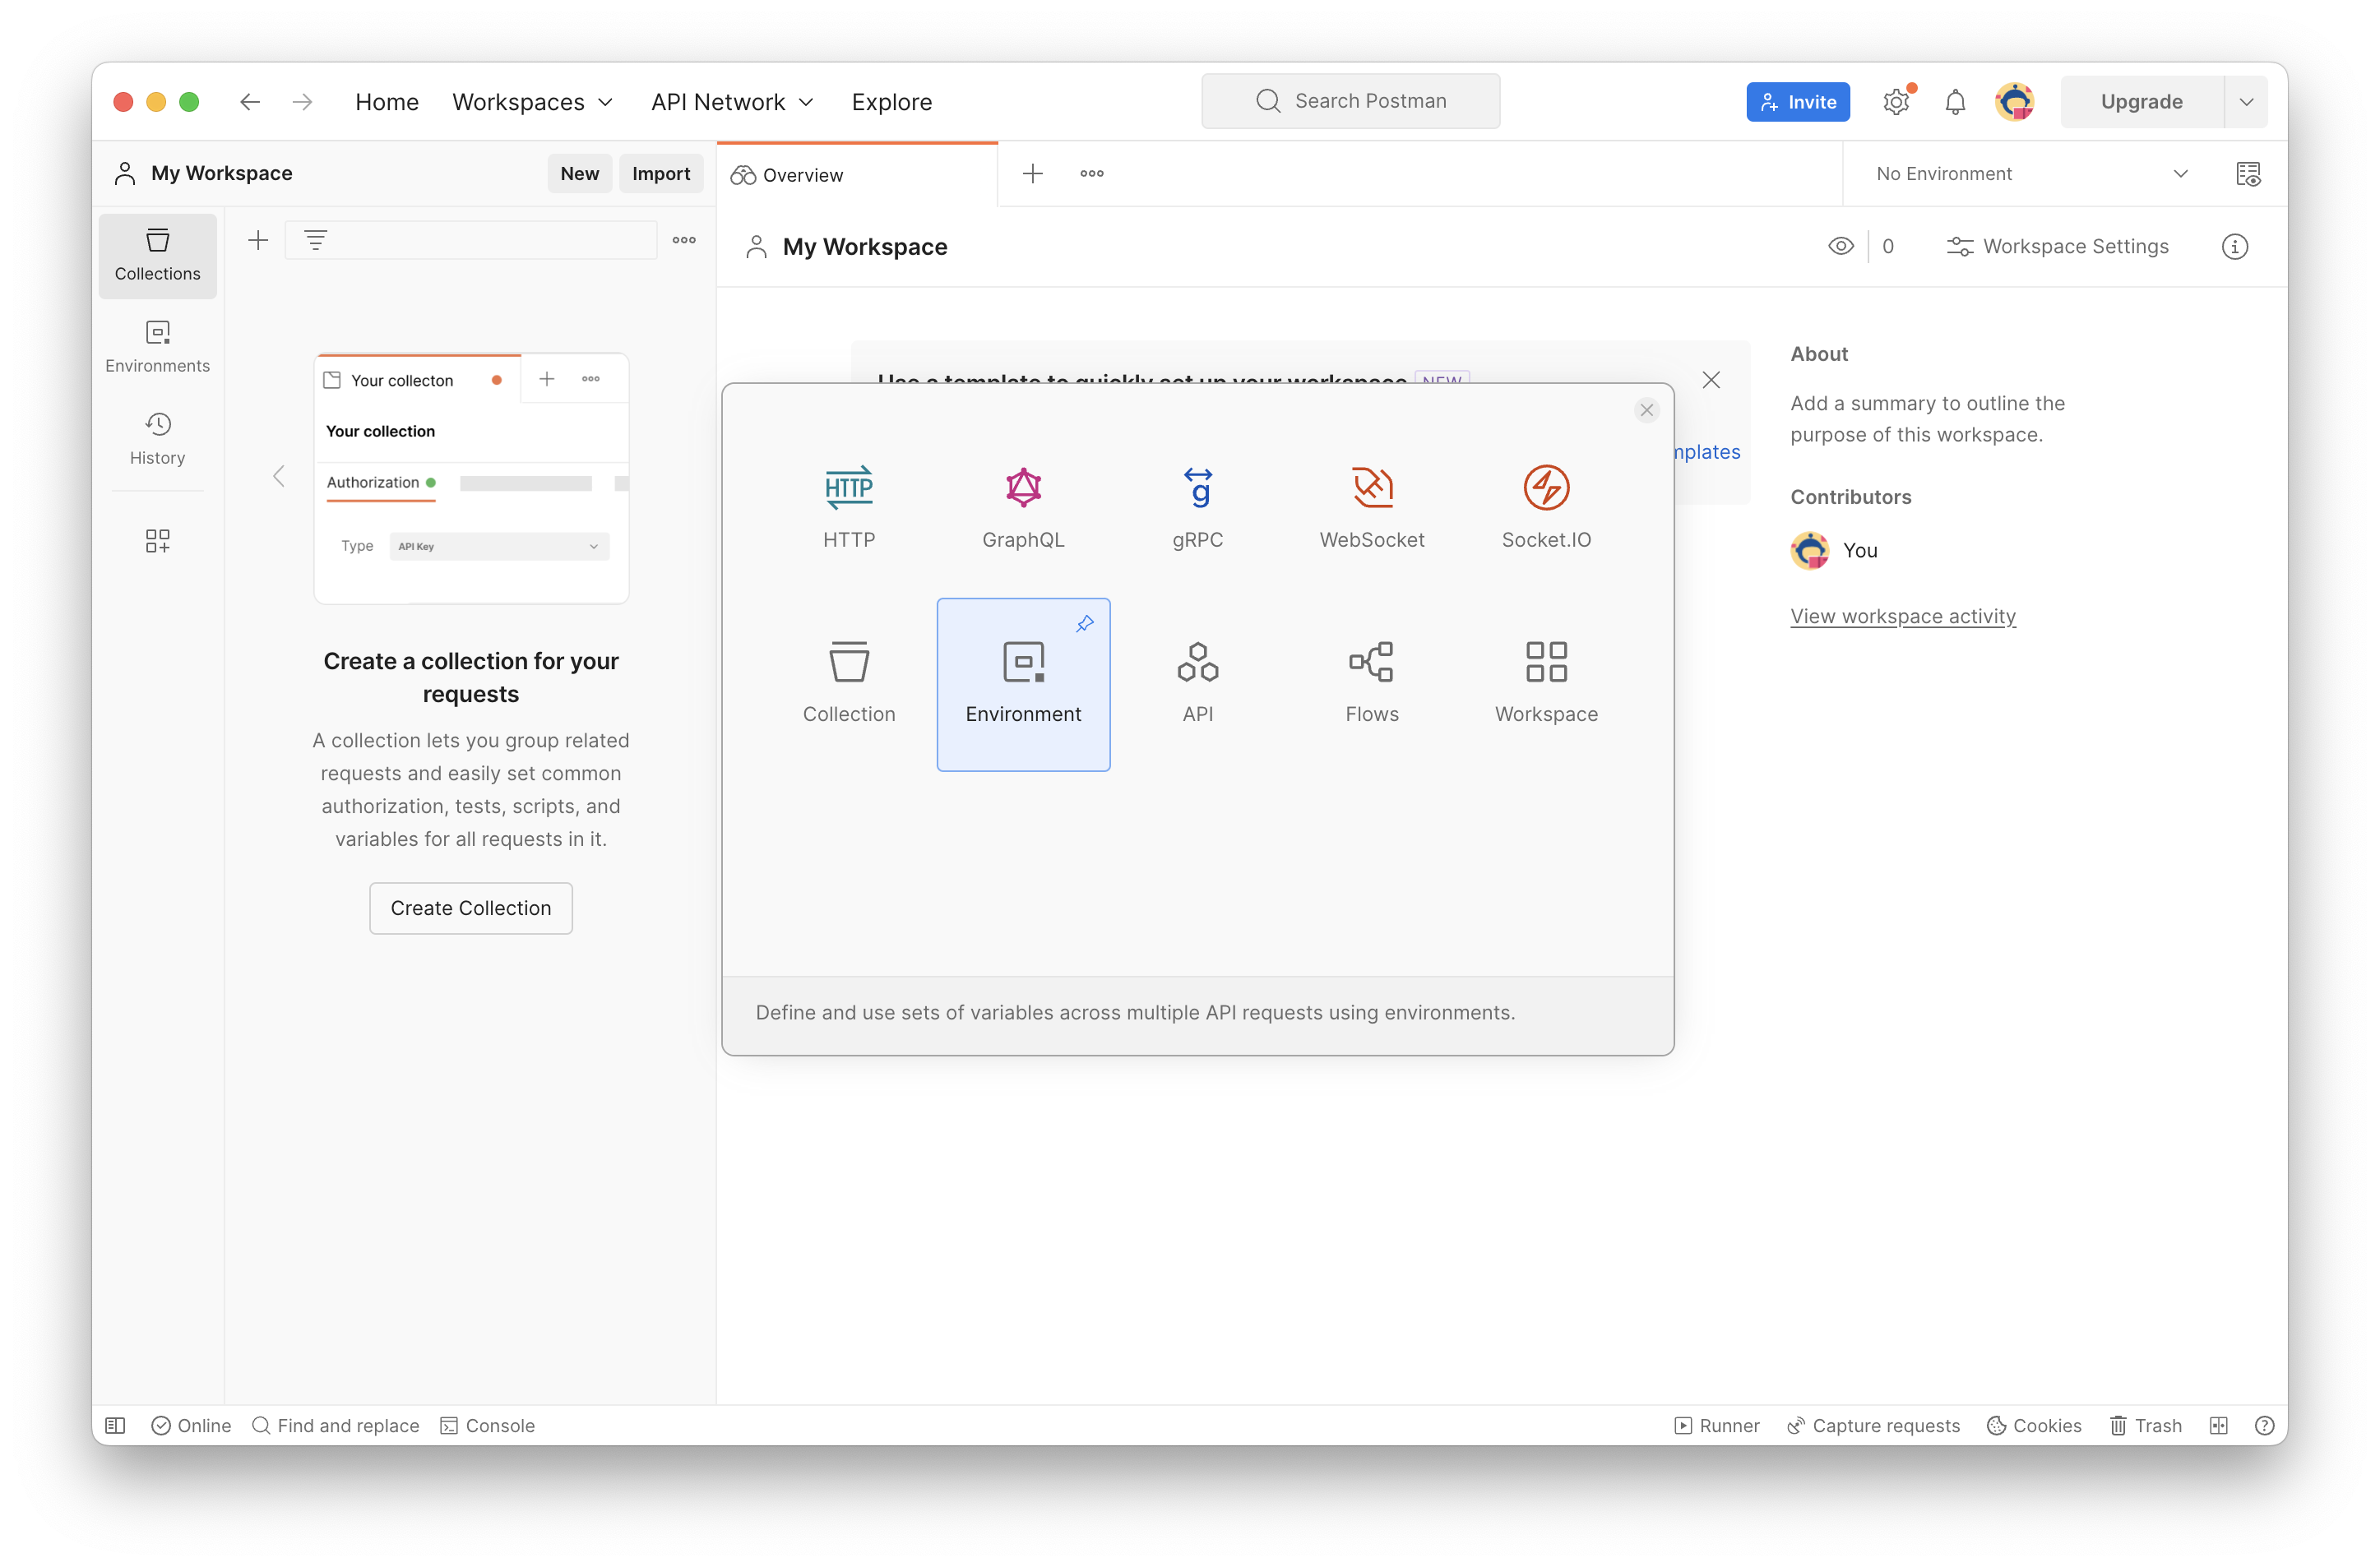
Now add the following environment variables:
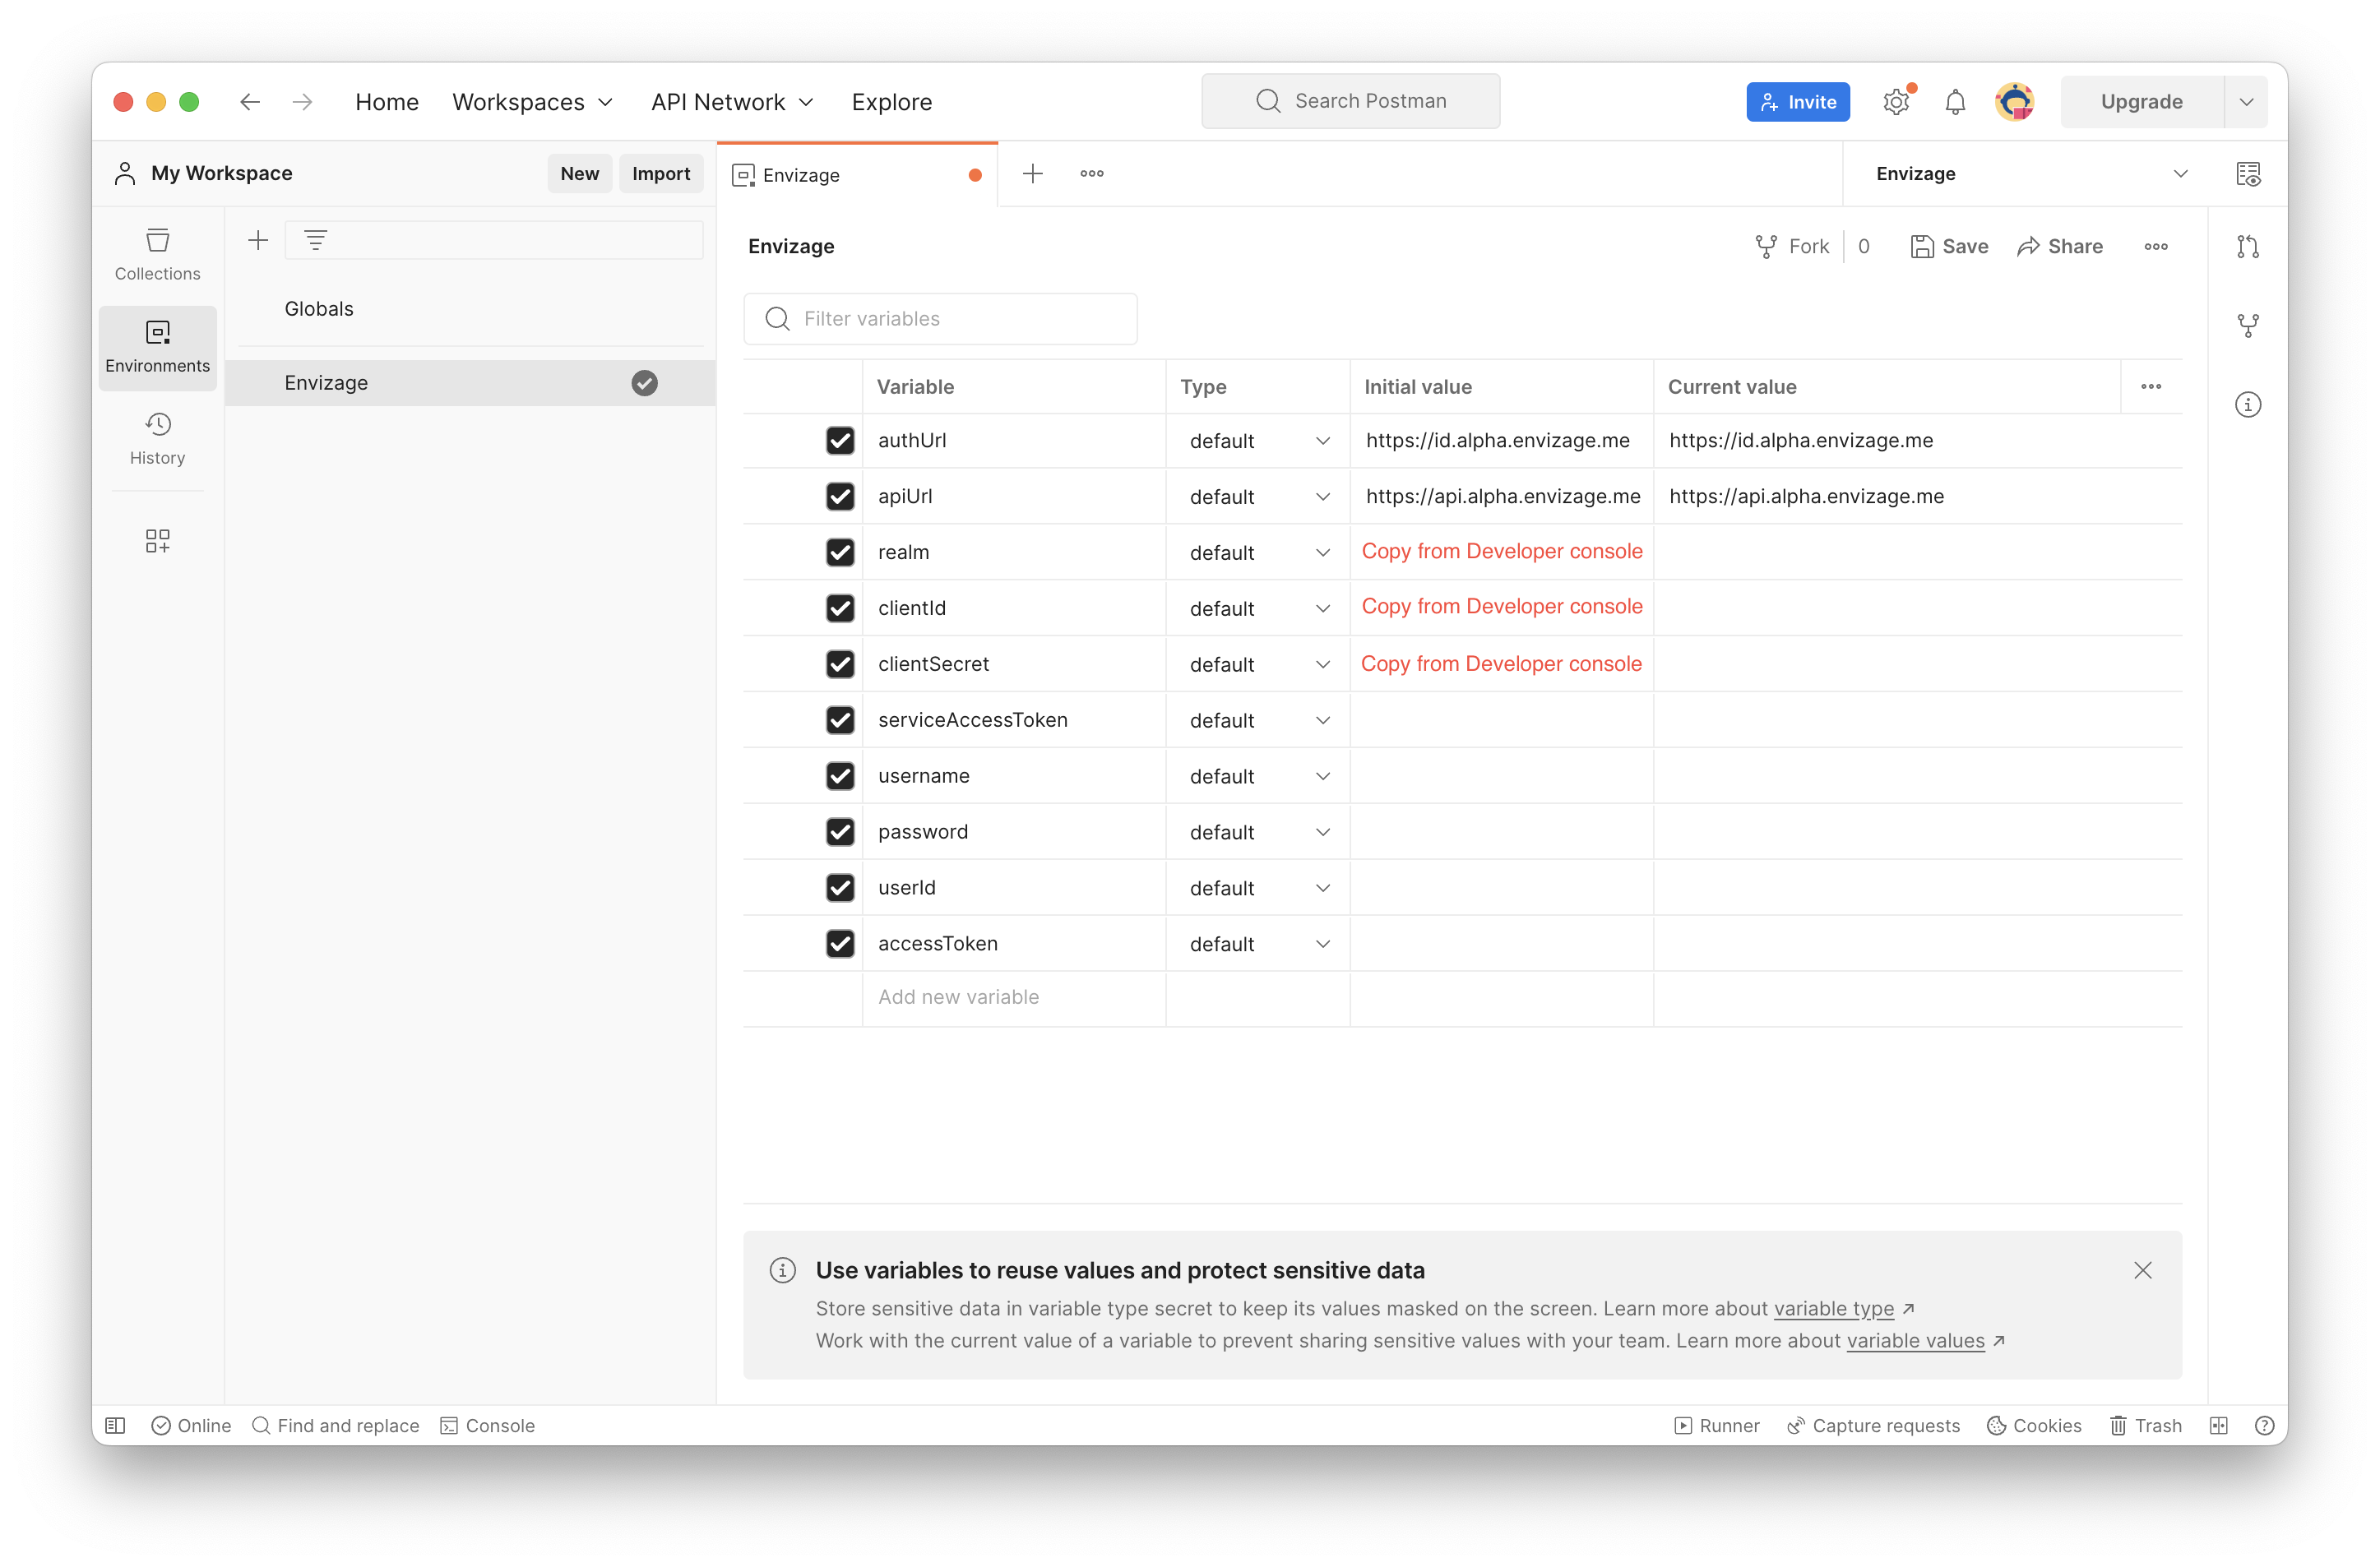
authUrl: https://id.production.envizage.me

apiUrl: https://api.envizage.me

realm: <THE GENERATED REALM FROM DEVELOPER CONSOLE>

clientId: <THE GENERATED ID FROM DEVELOPER CONSOLE>

clientSecret: <THE GENERATED SECRET FROM DEVELOPER CONSOLE>
Realm, clientId and clientSecret are generated in Developer console after connecting a back-end application and can be found in Applications page.
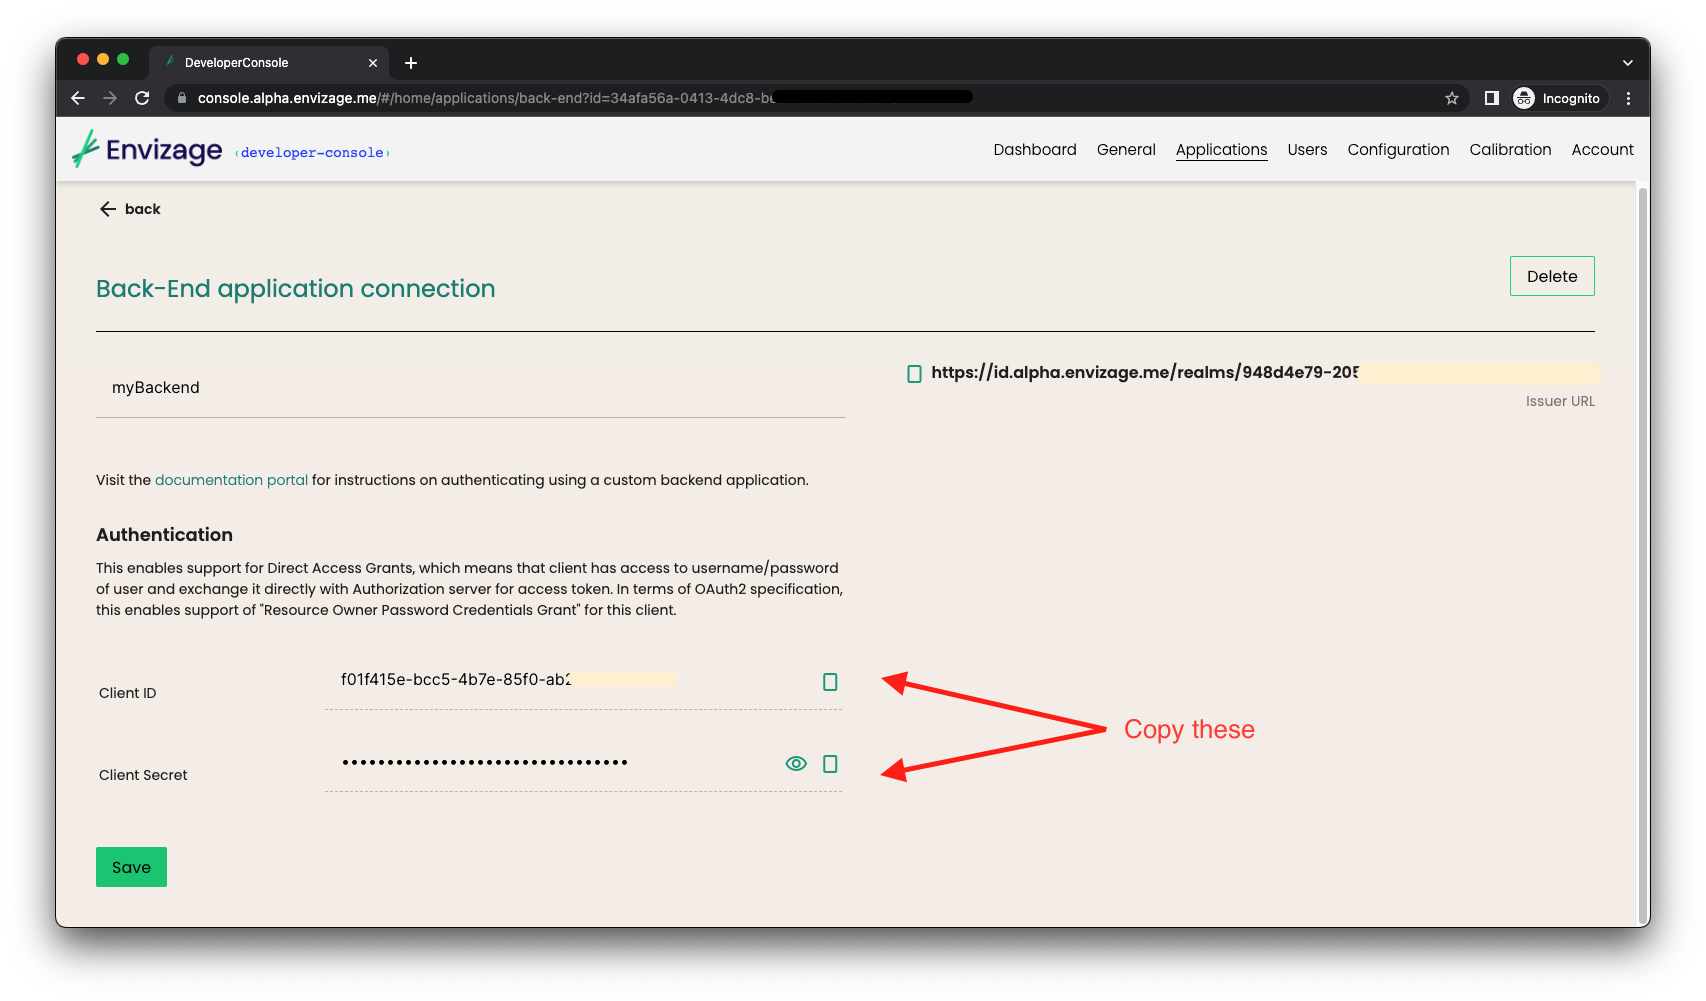
Environments can be managed by clicking the gear button in the top right corner of the app.
Step 3: Import the workflow and implement the client credentials flow
Click the Import button in the top left corner (next to New) and select or drag and drop the downloaded JSON file.
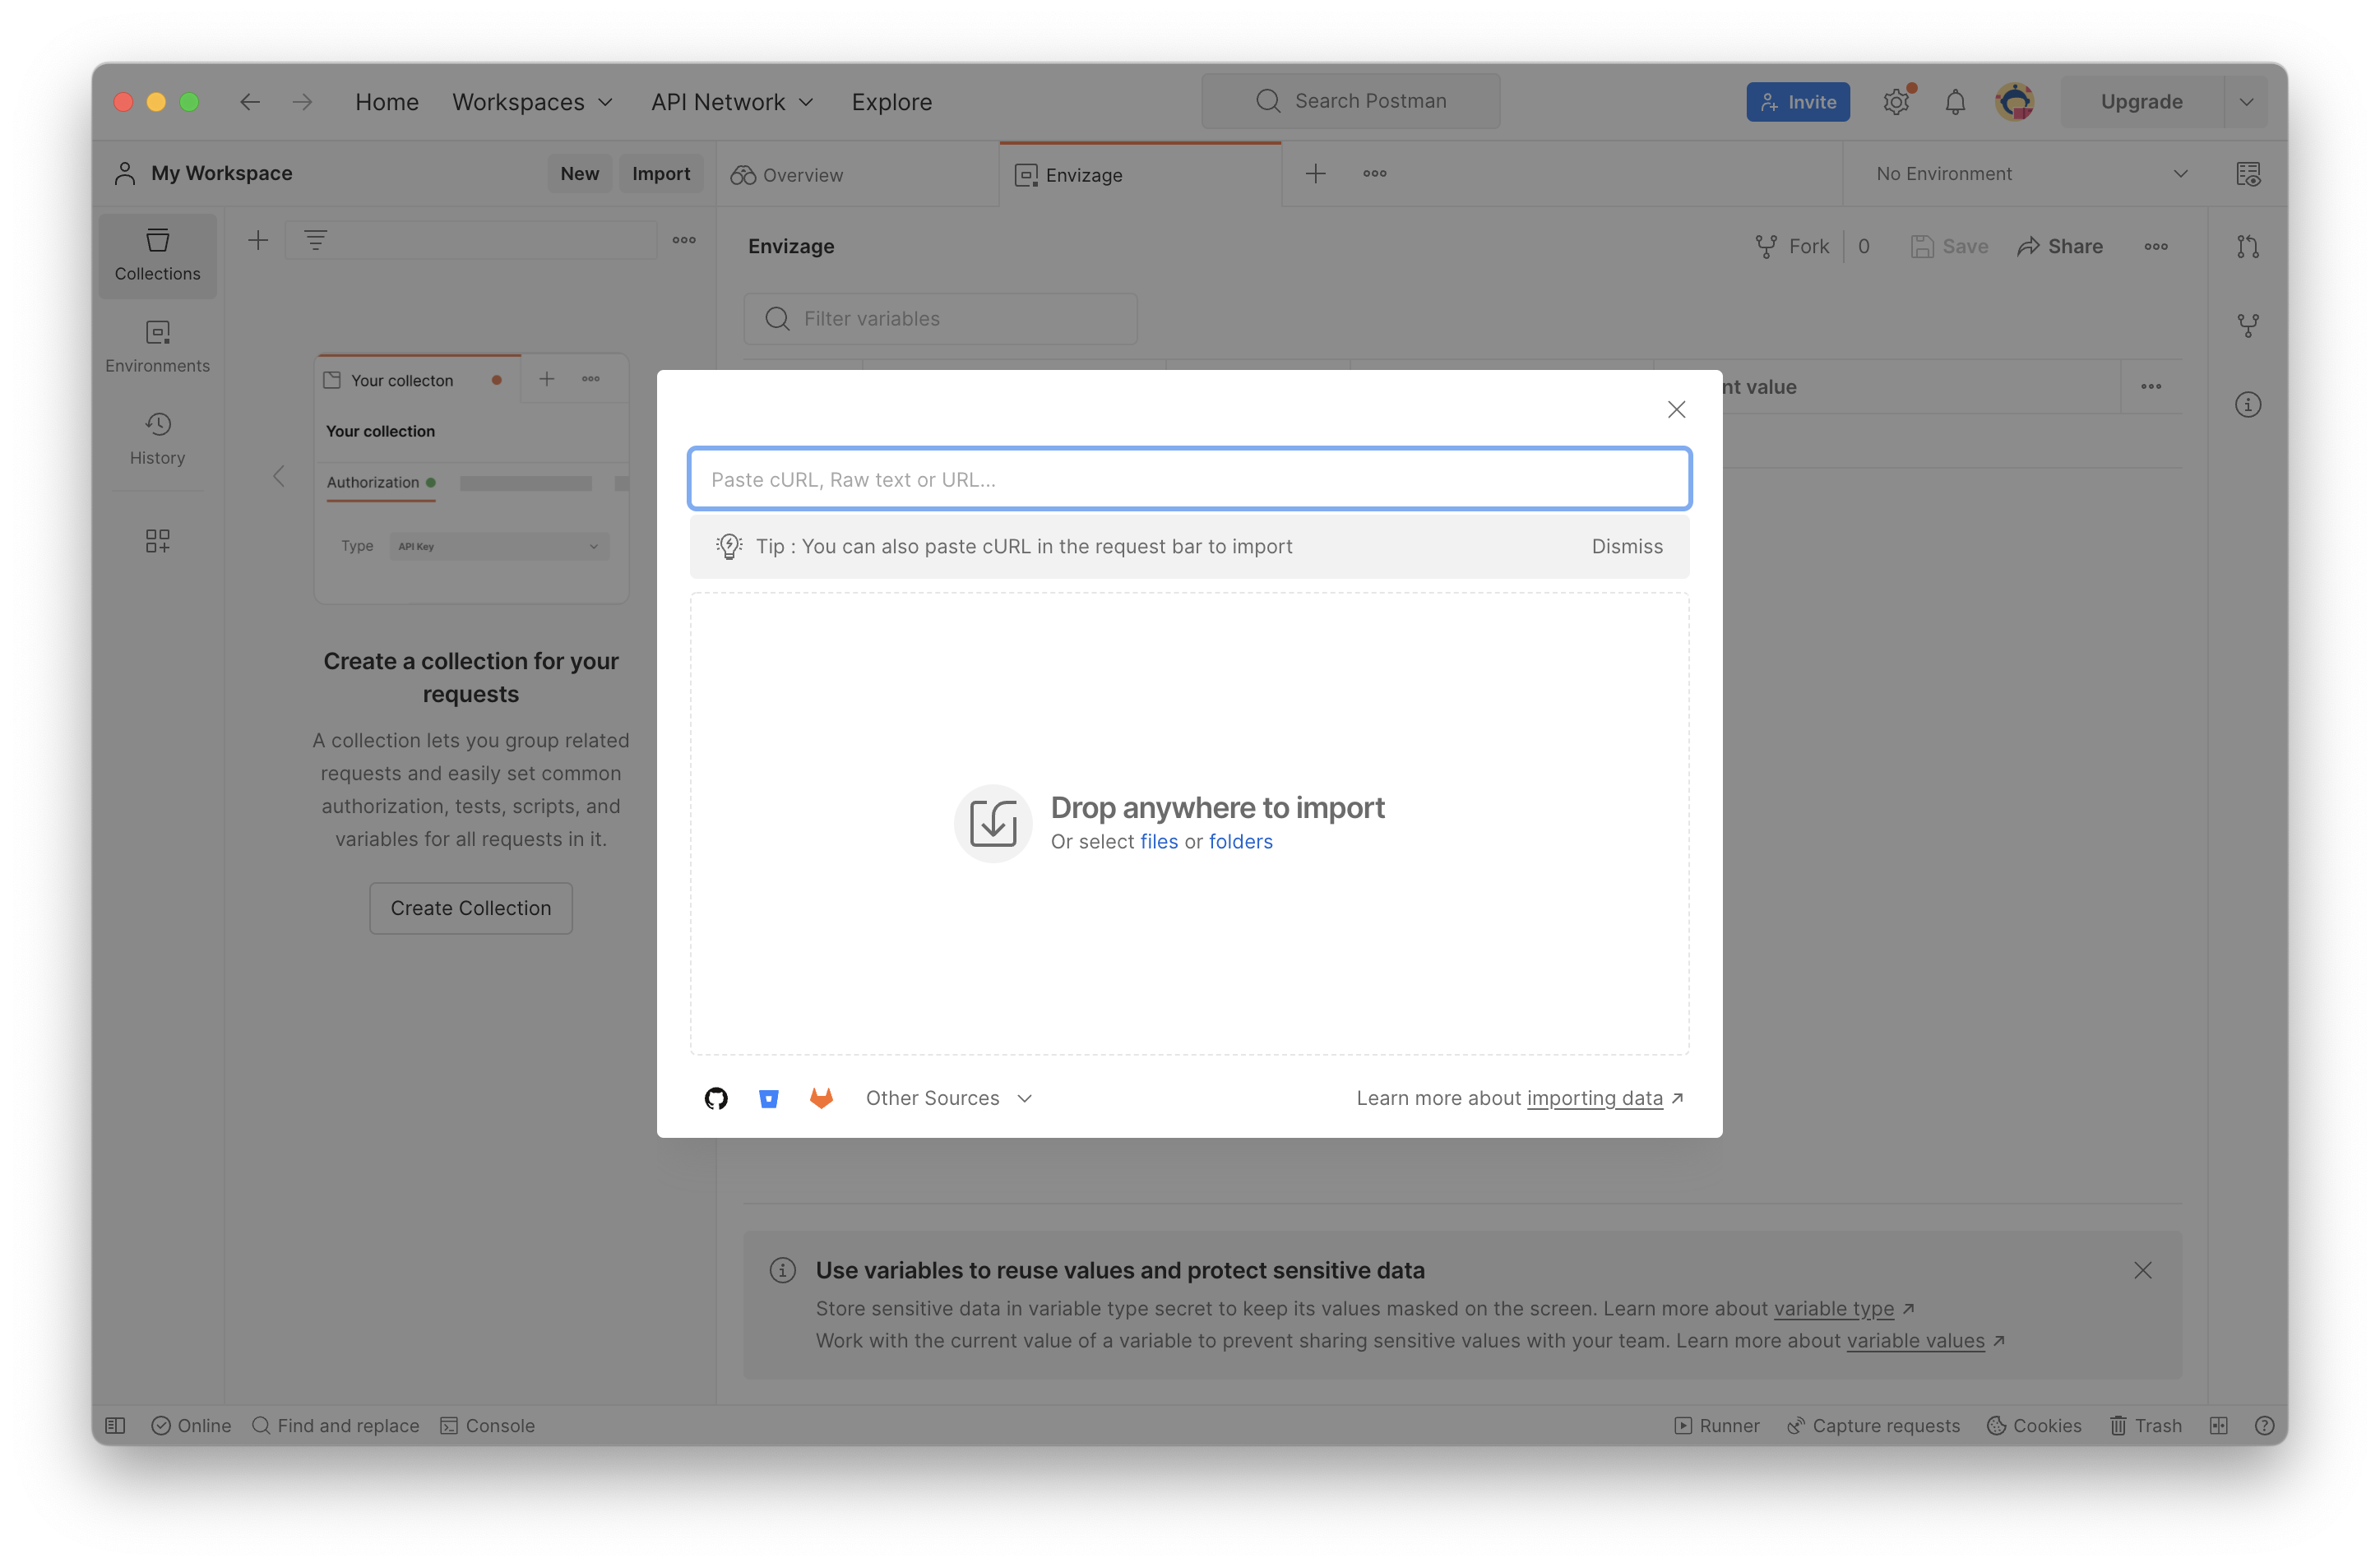
Once the Workflow is imported, it should appear in the left hand side menu.
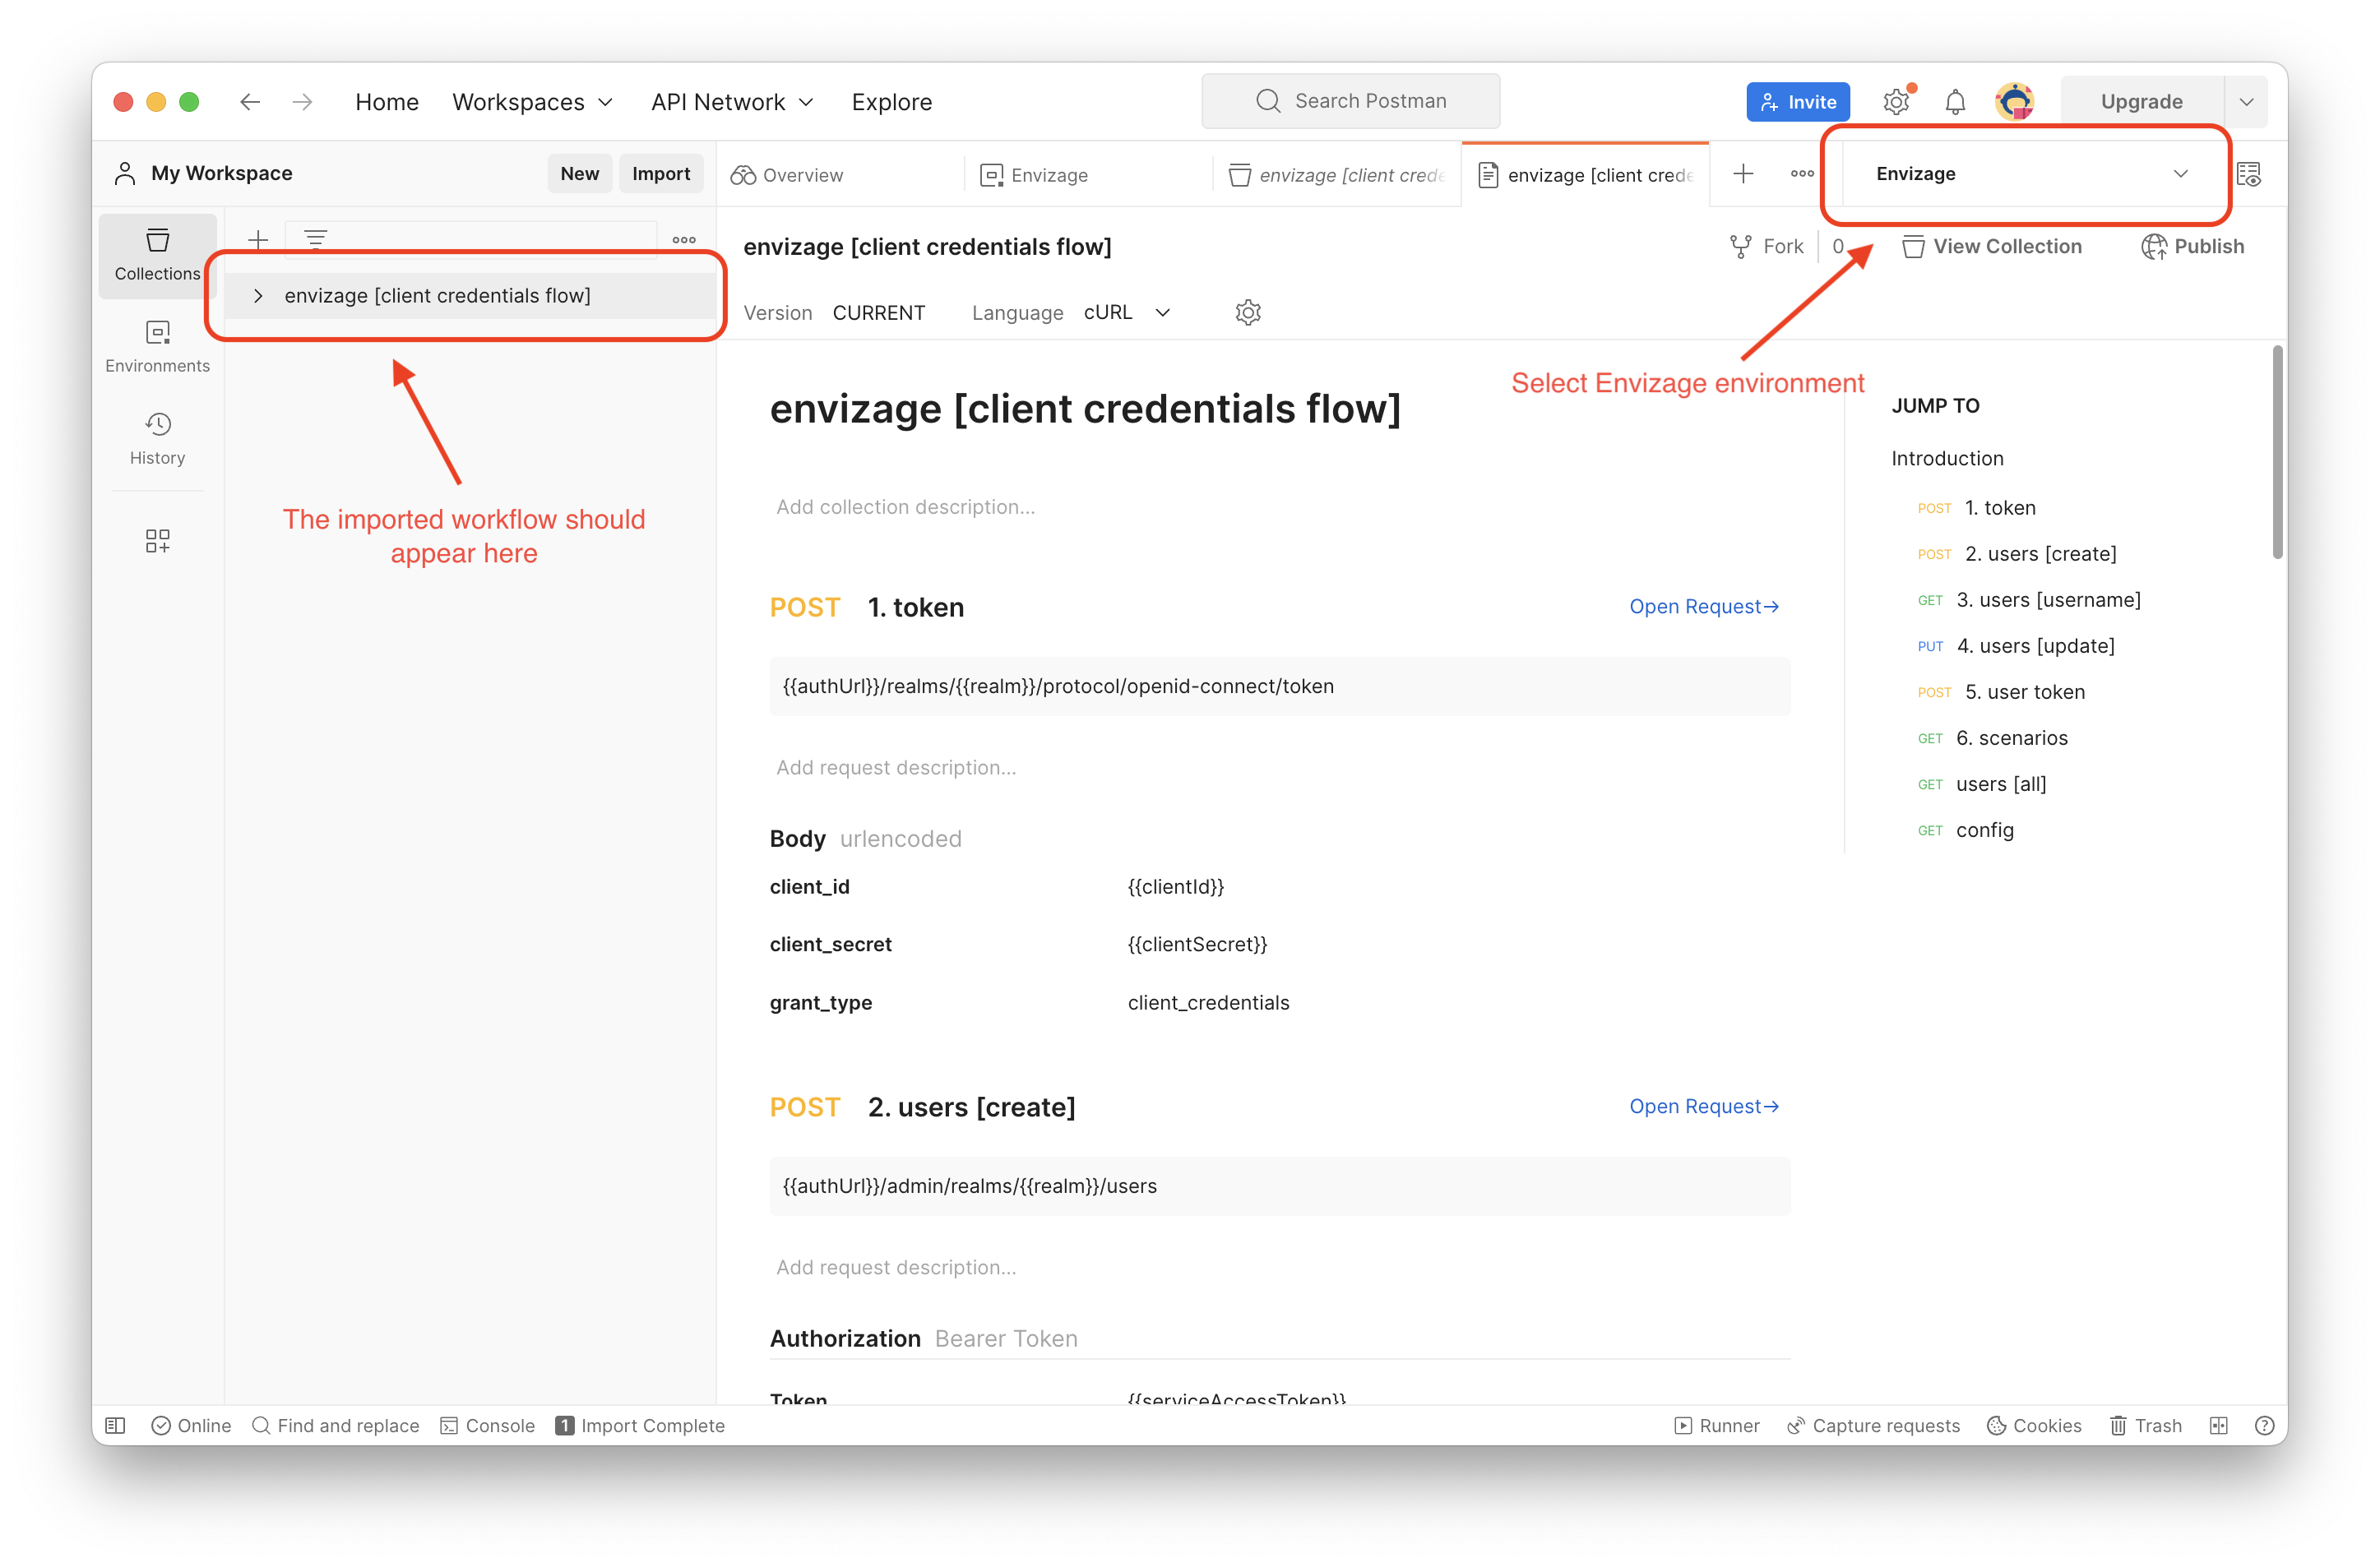
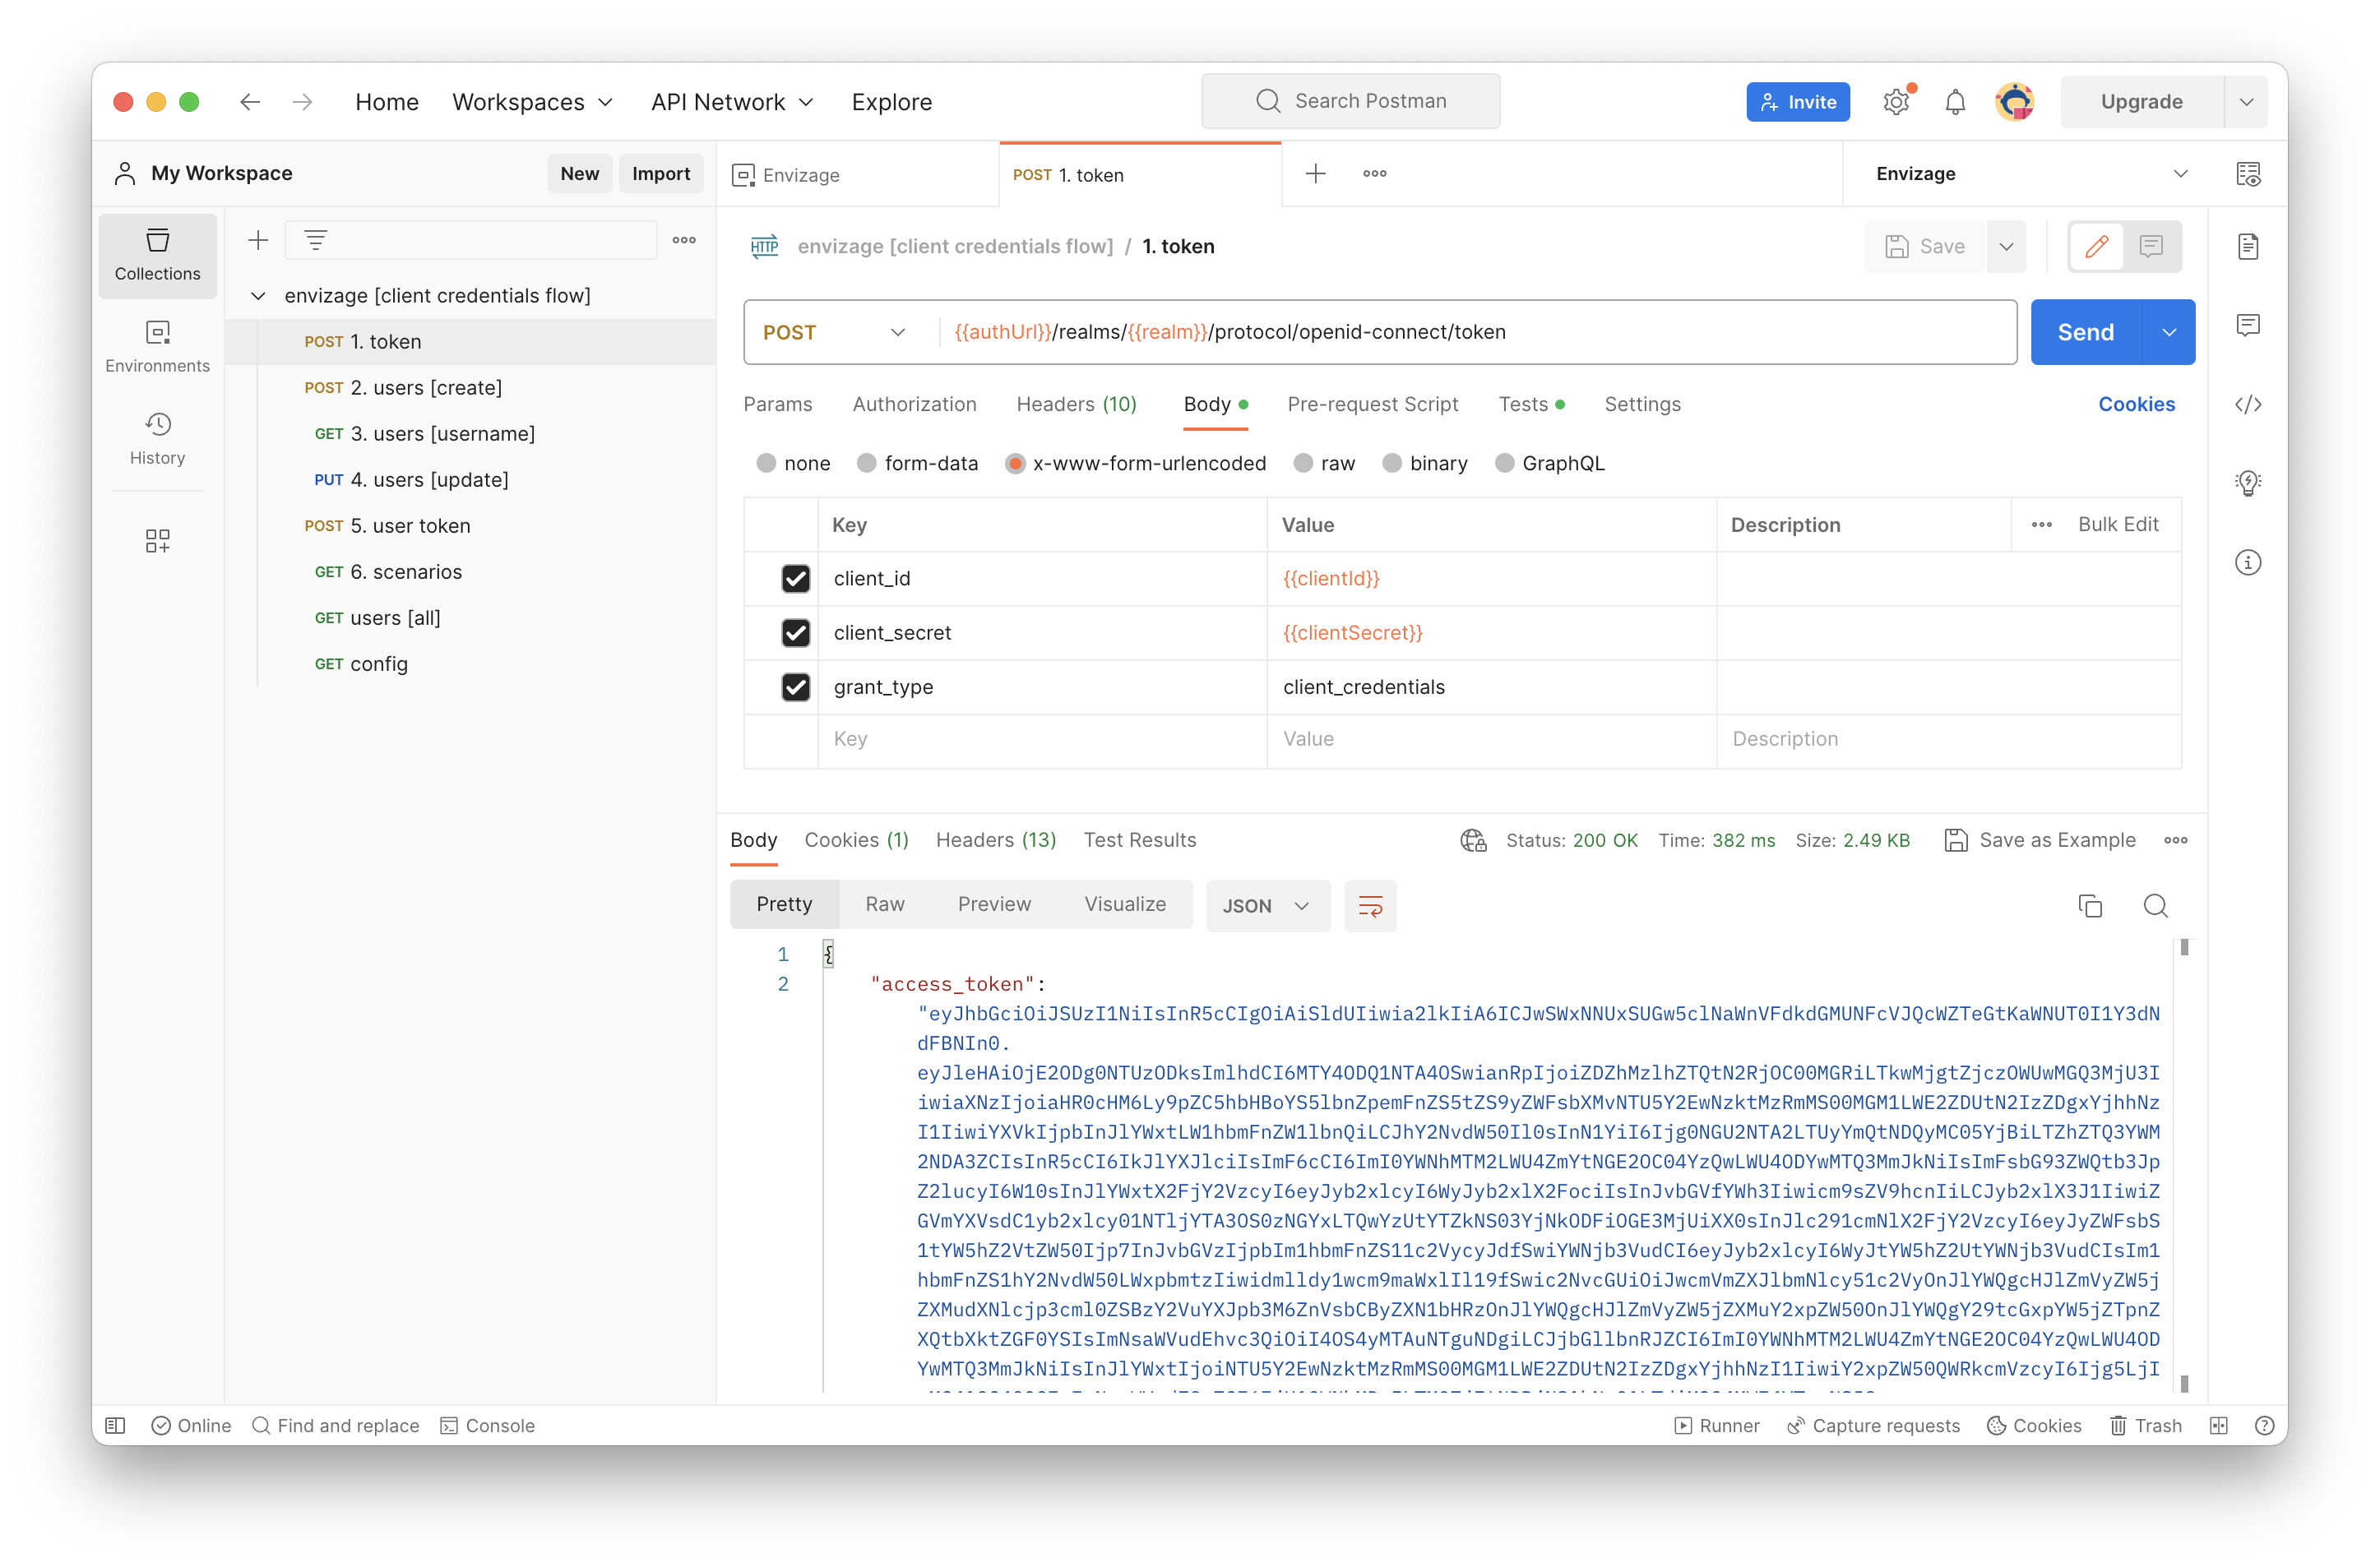
Expand “Envizage - Basic” and select the first request named "Get Service Account Access Token". Make sure that the Envizage environment is selected in the top right corner, and click “Send”.
If the call was successful, then the result will be returned and displayed in the bottom half of the screen and the resulting access token is saved in the environment, so the next call can be made.
The snippet which saves the service access token can be found under Tests in the request bar.
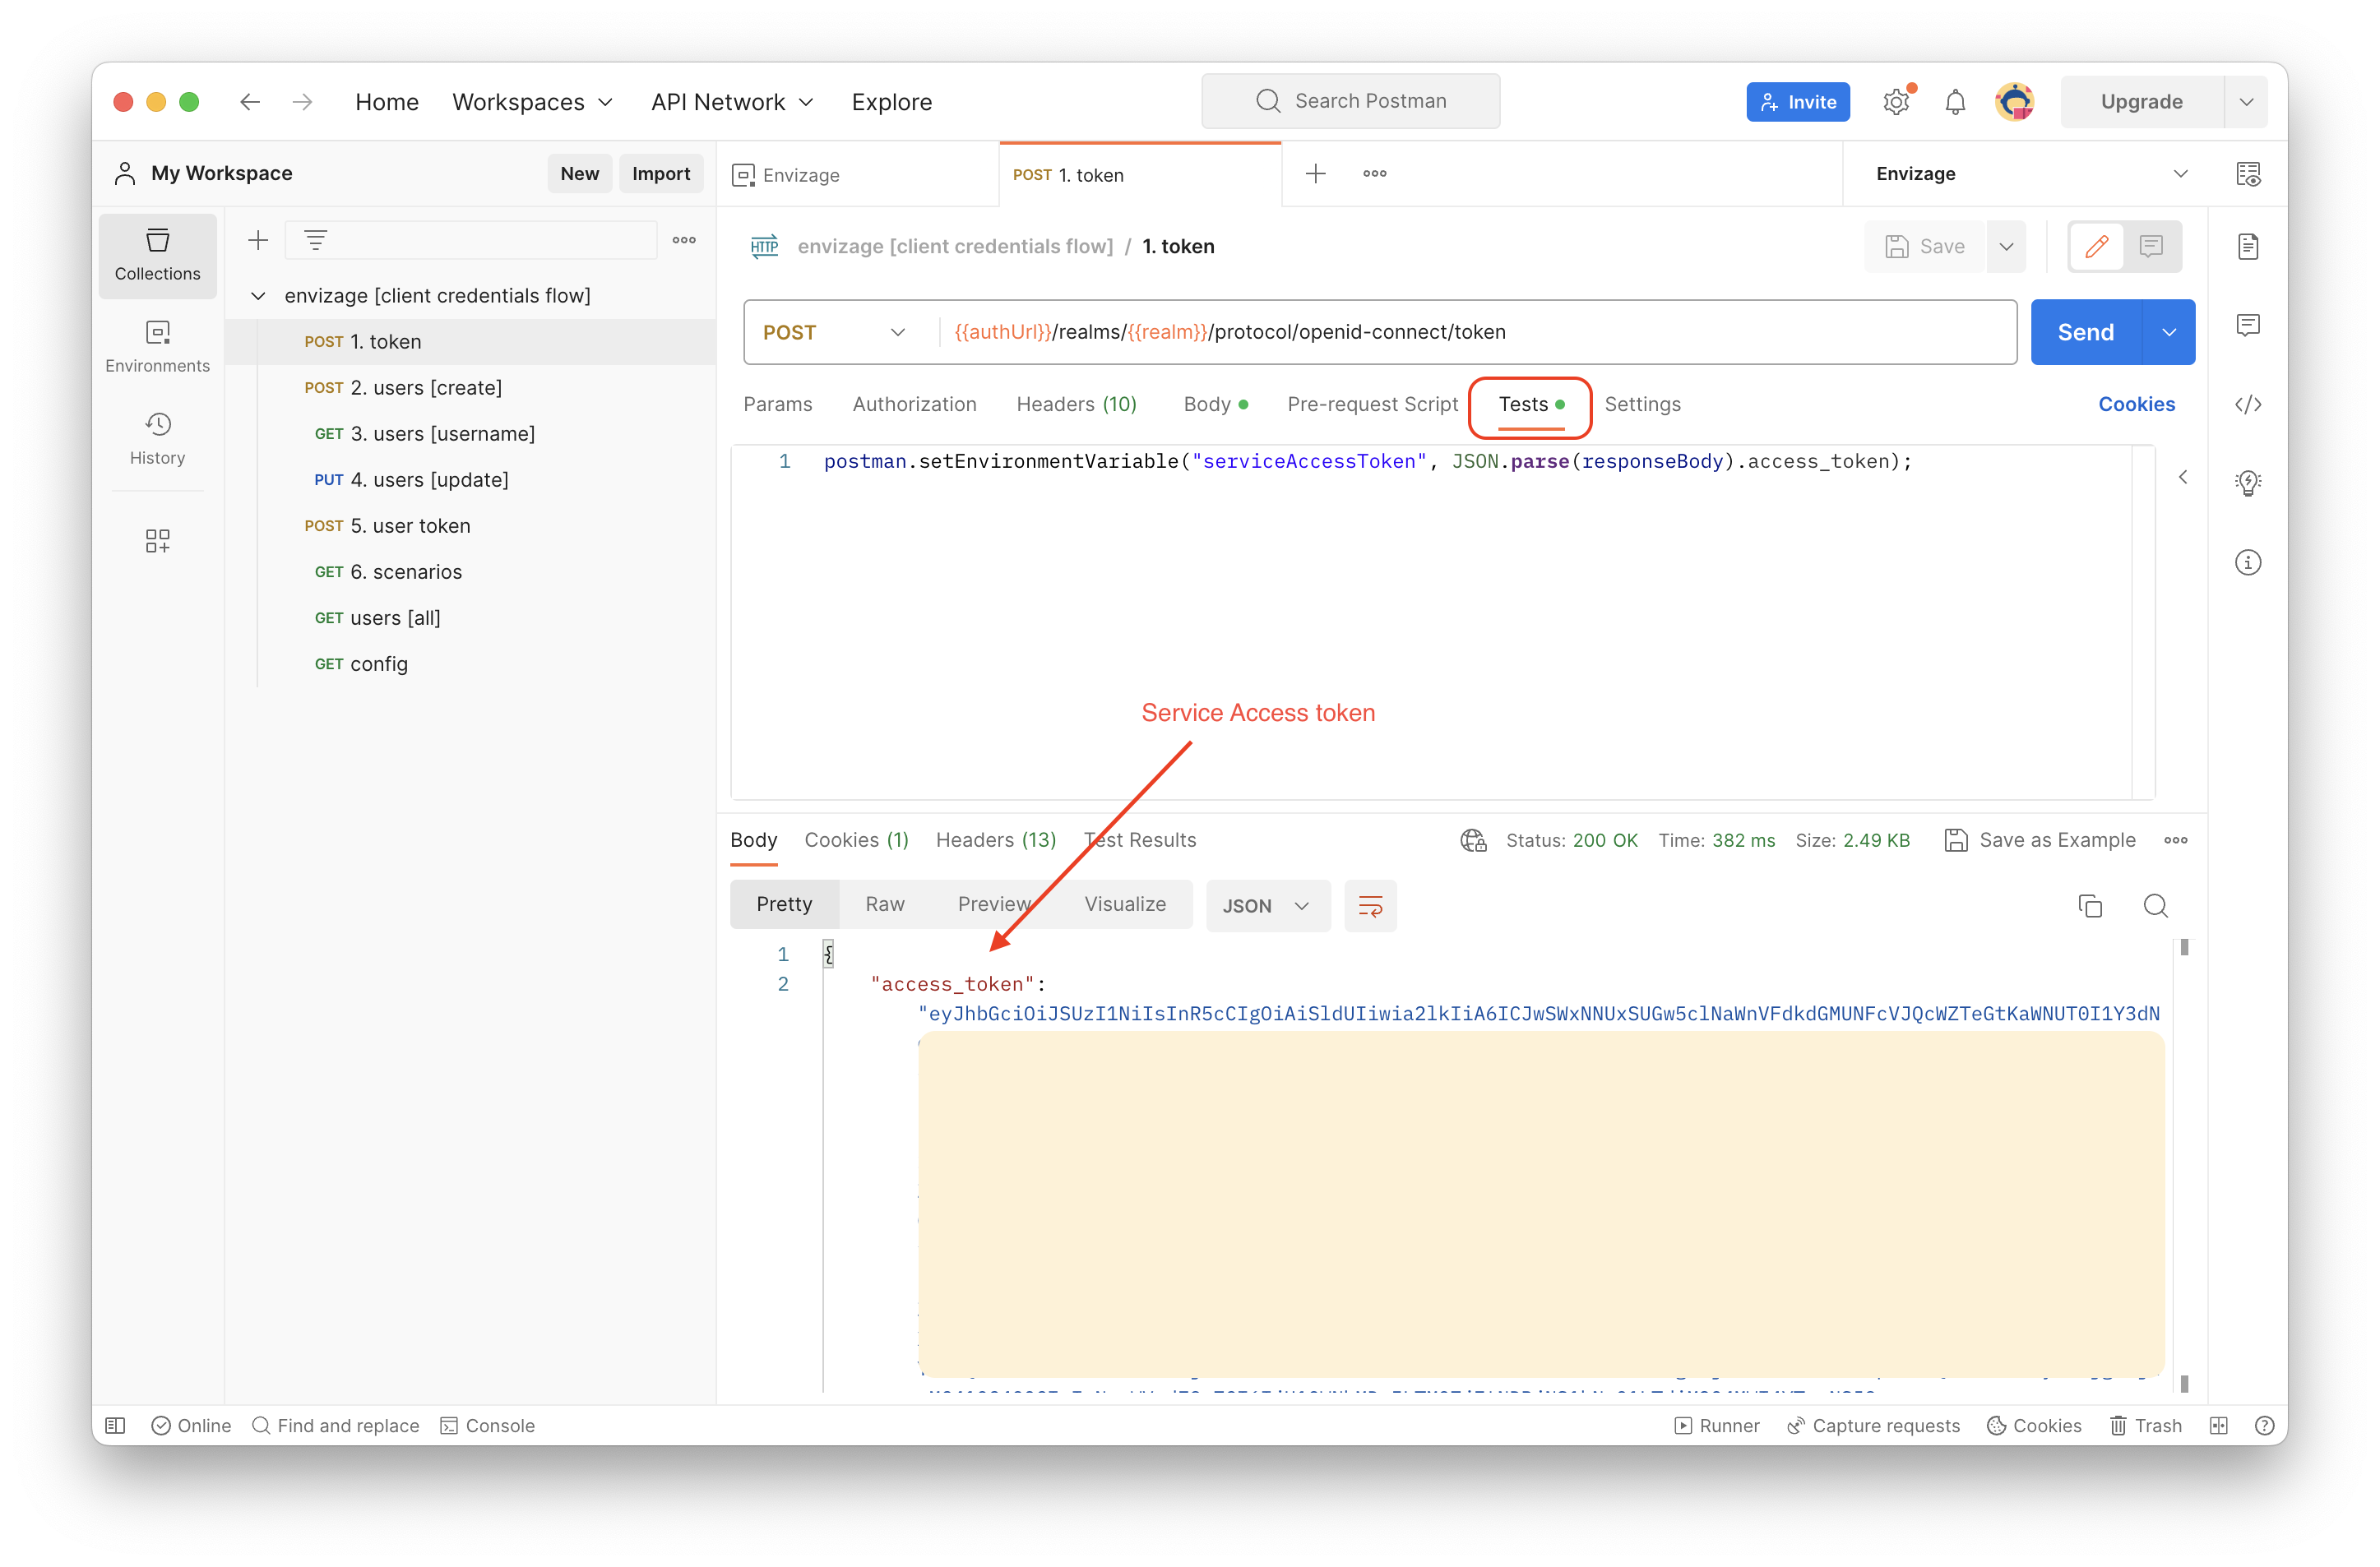
This snippet extracts the access token from the result body of the request, and saves it under the variable name “serviceAccessToken”. This value now can be used in subsequent calls (within the Envizage environment) by surrounding the variable names with curly braces.
The latest version of Postman has dedicated Authorization mechanisms and you are no longer required to manually set the header. However, in the code you will still need to.
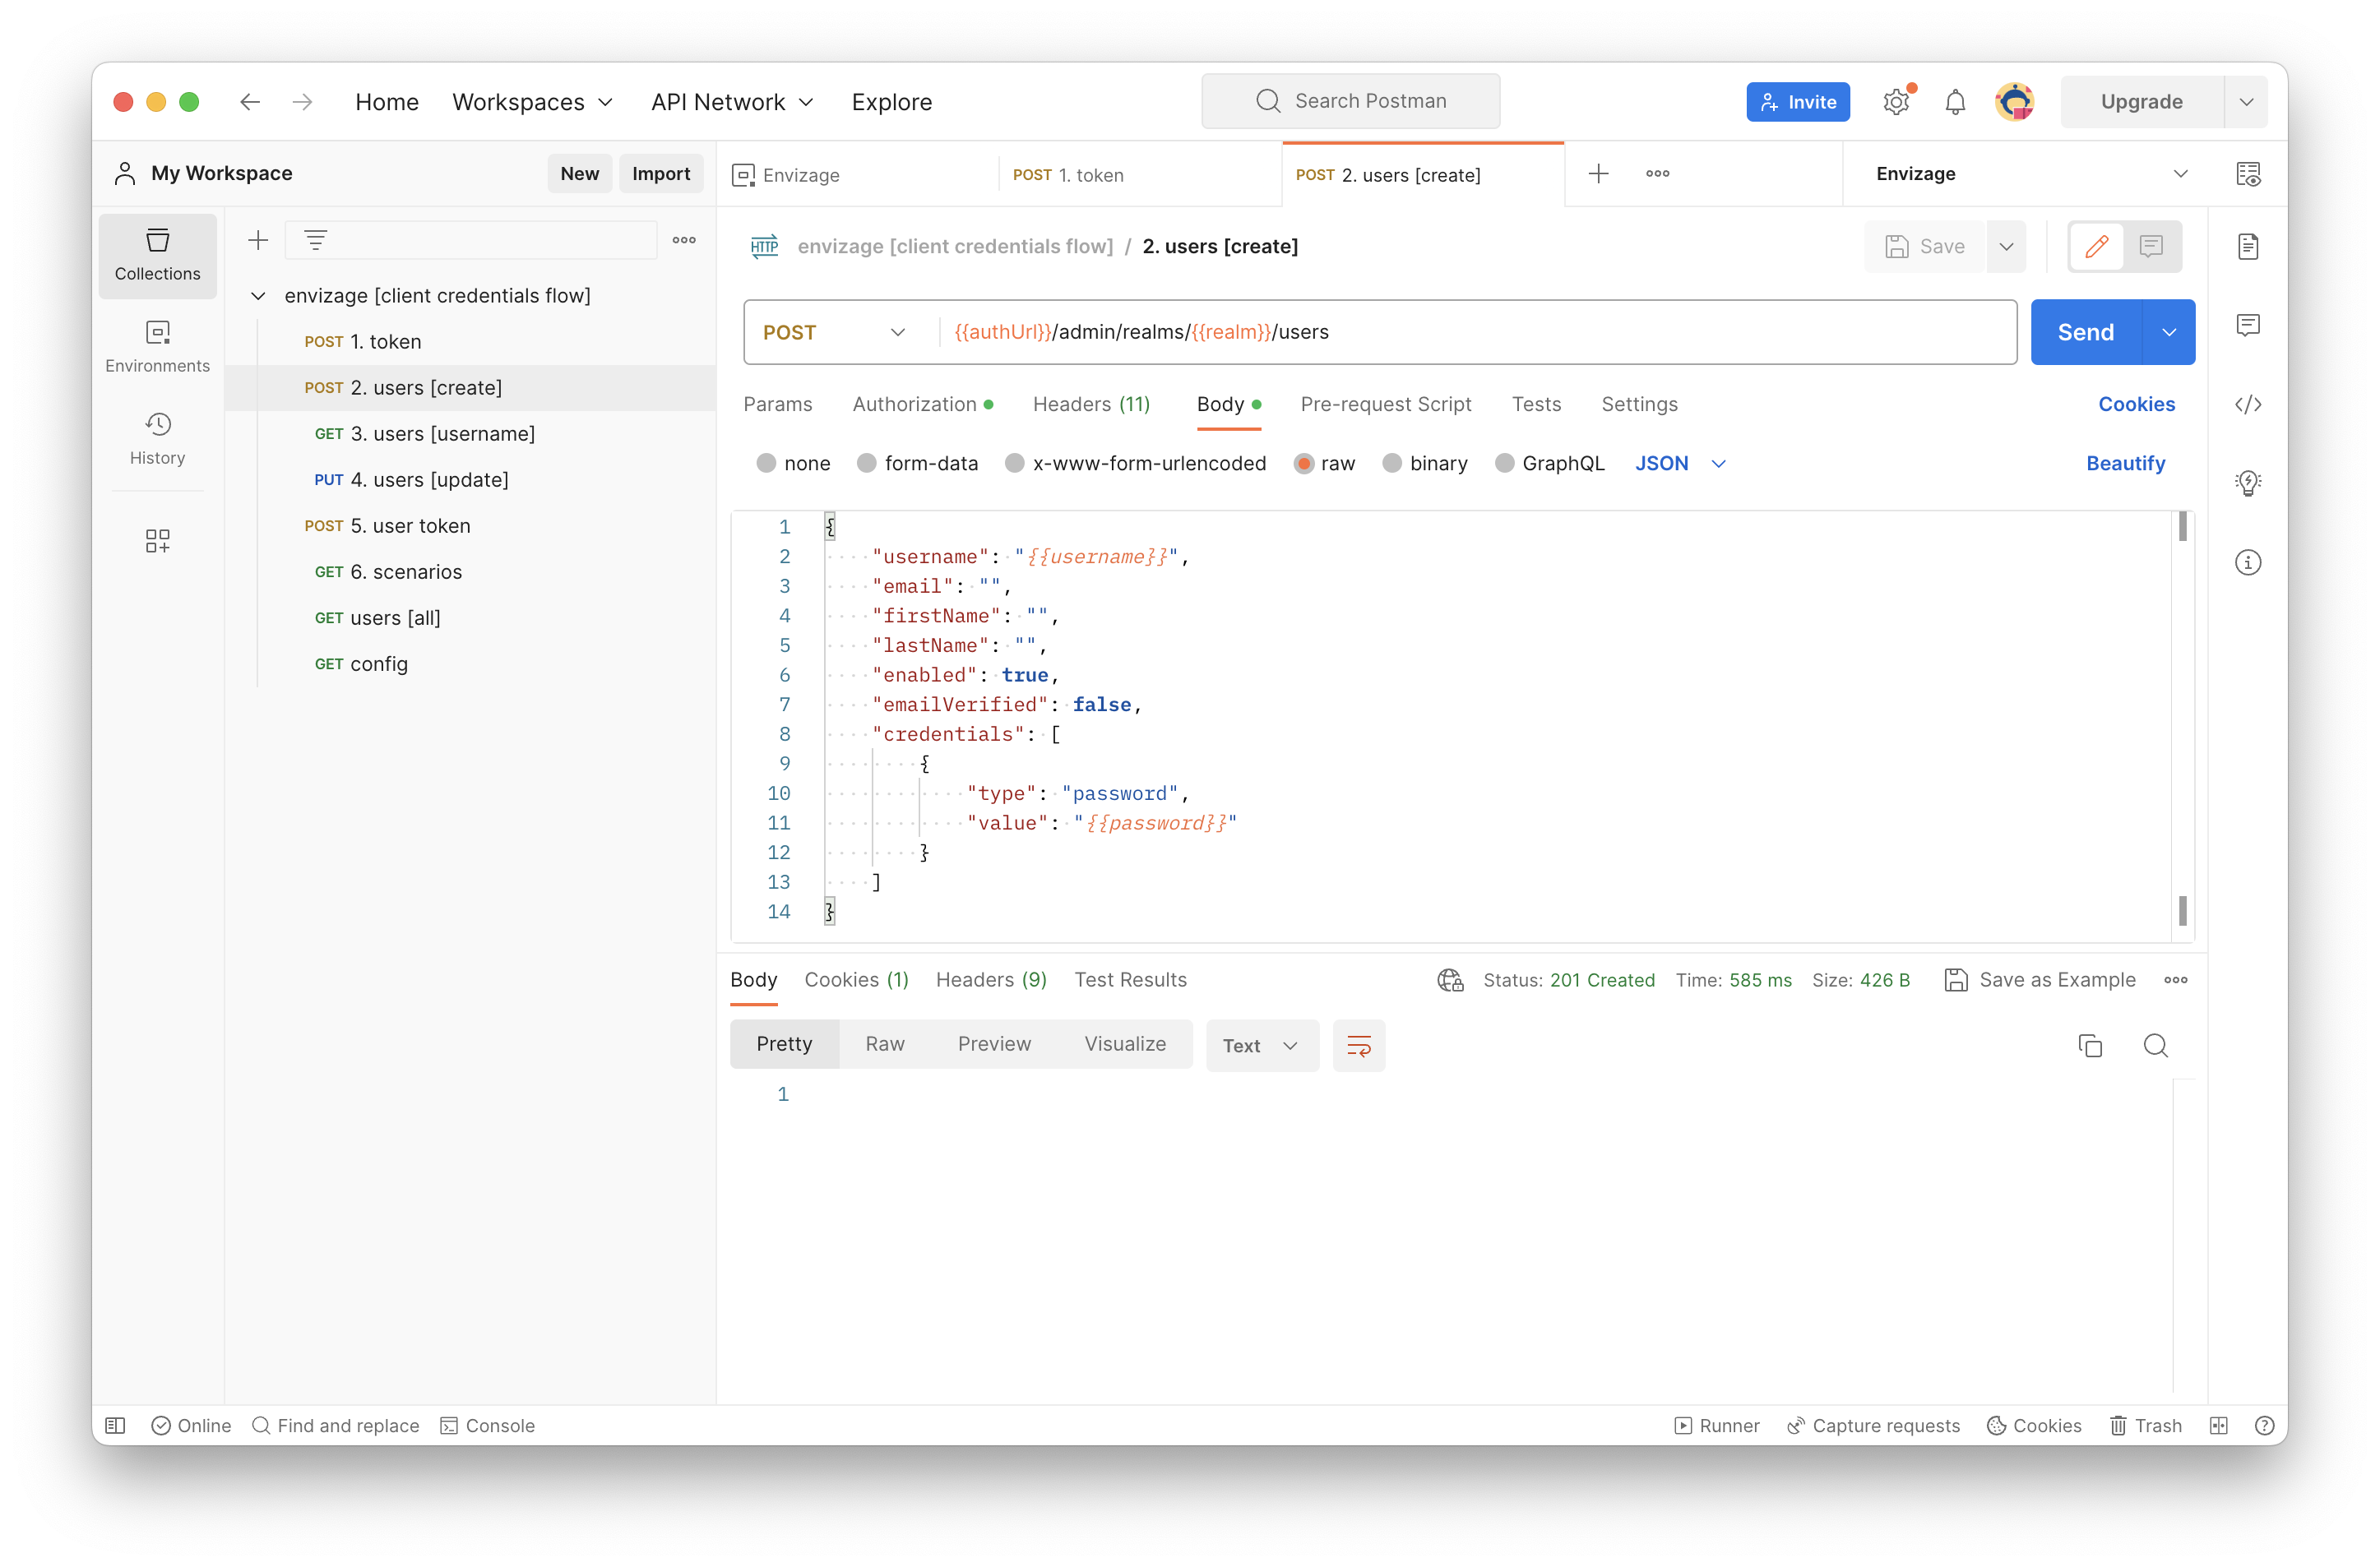
Use the serviceAccessToken obtained from the previous step in order to create a new user.
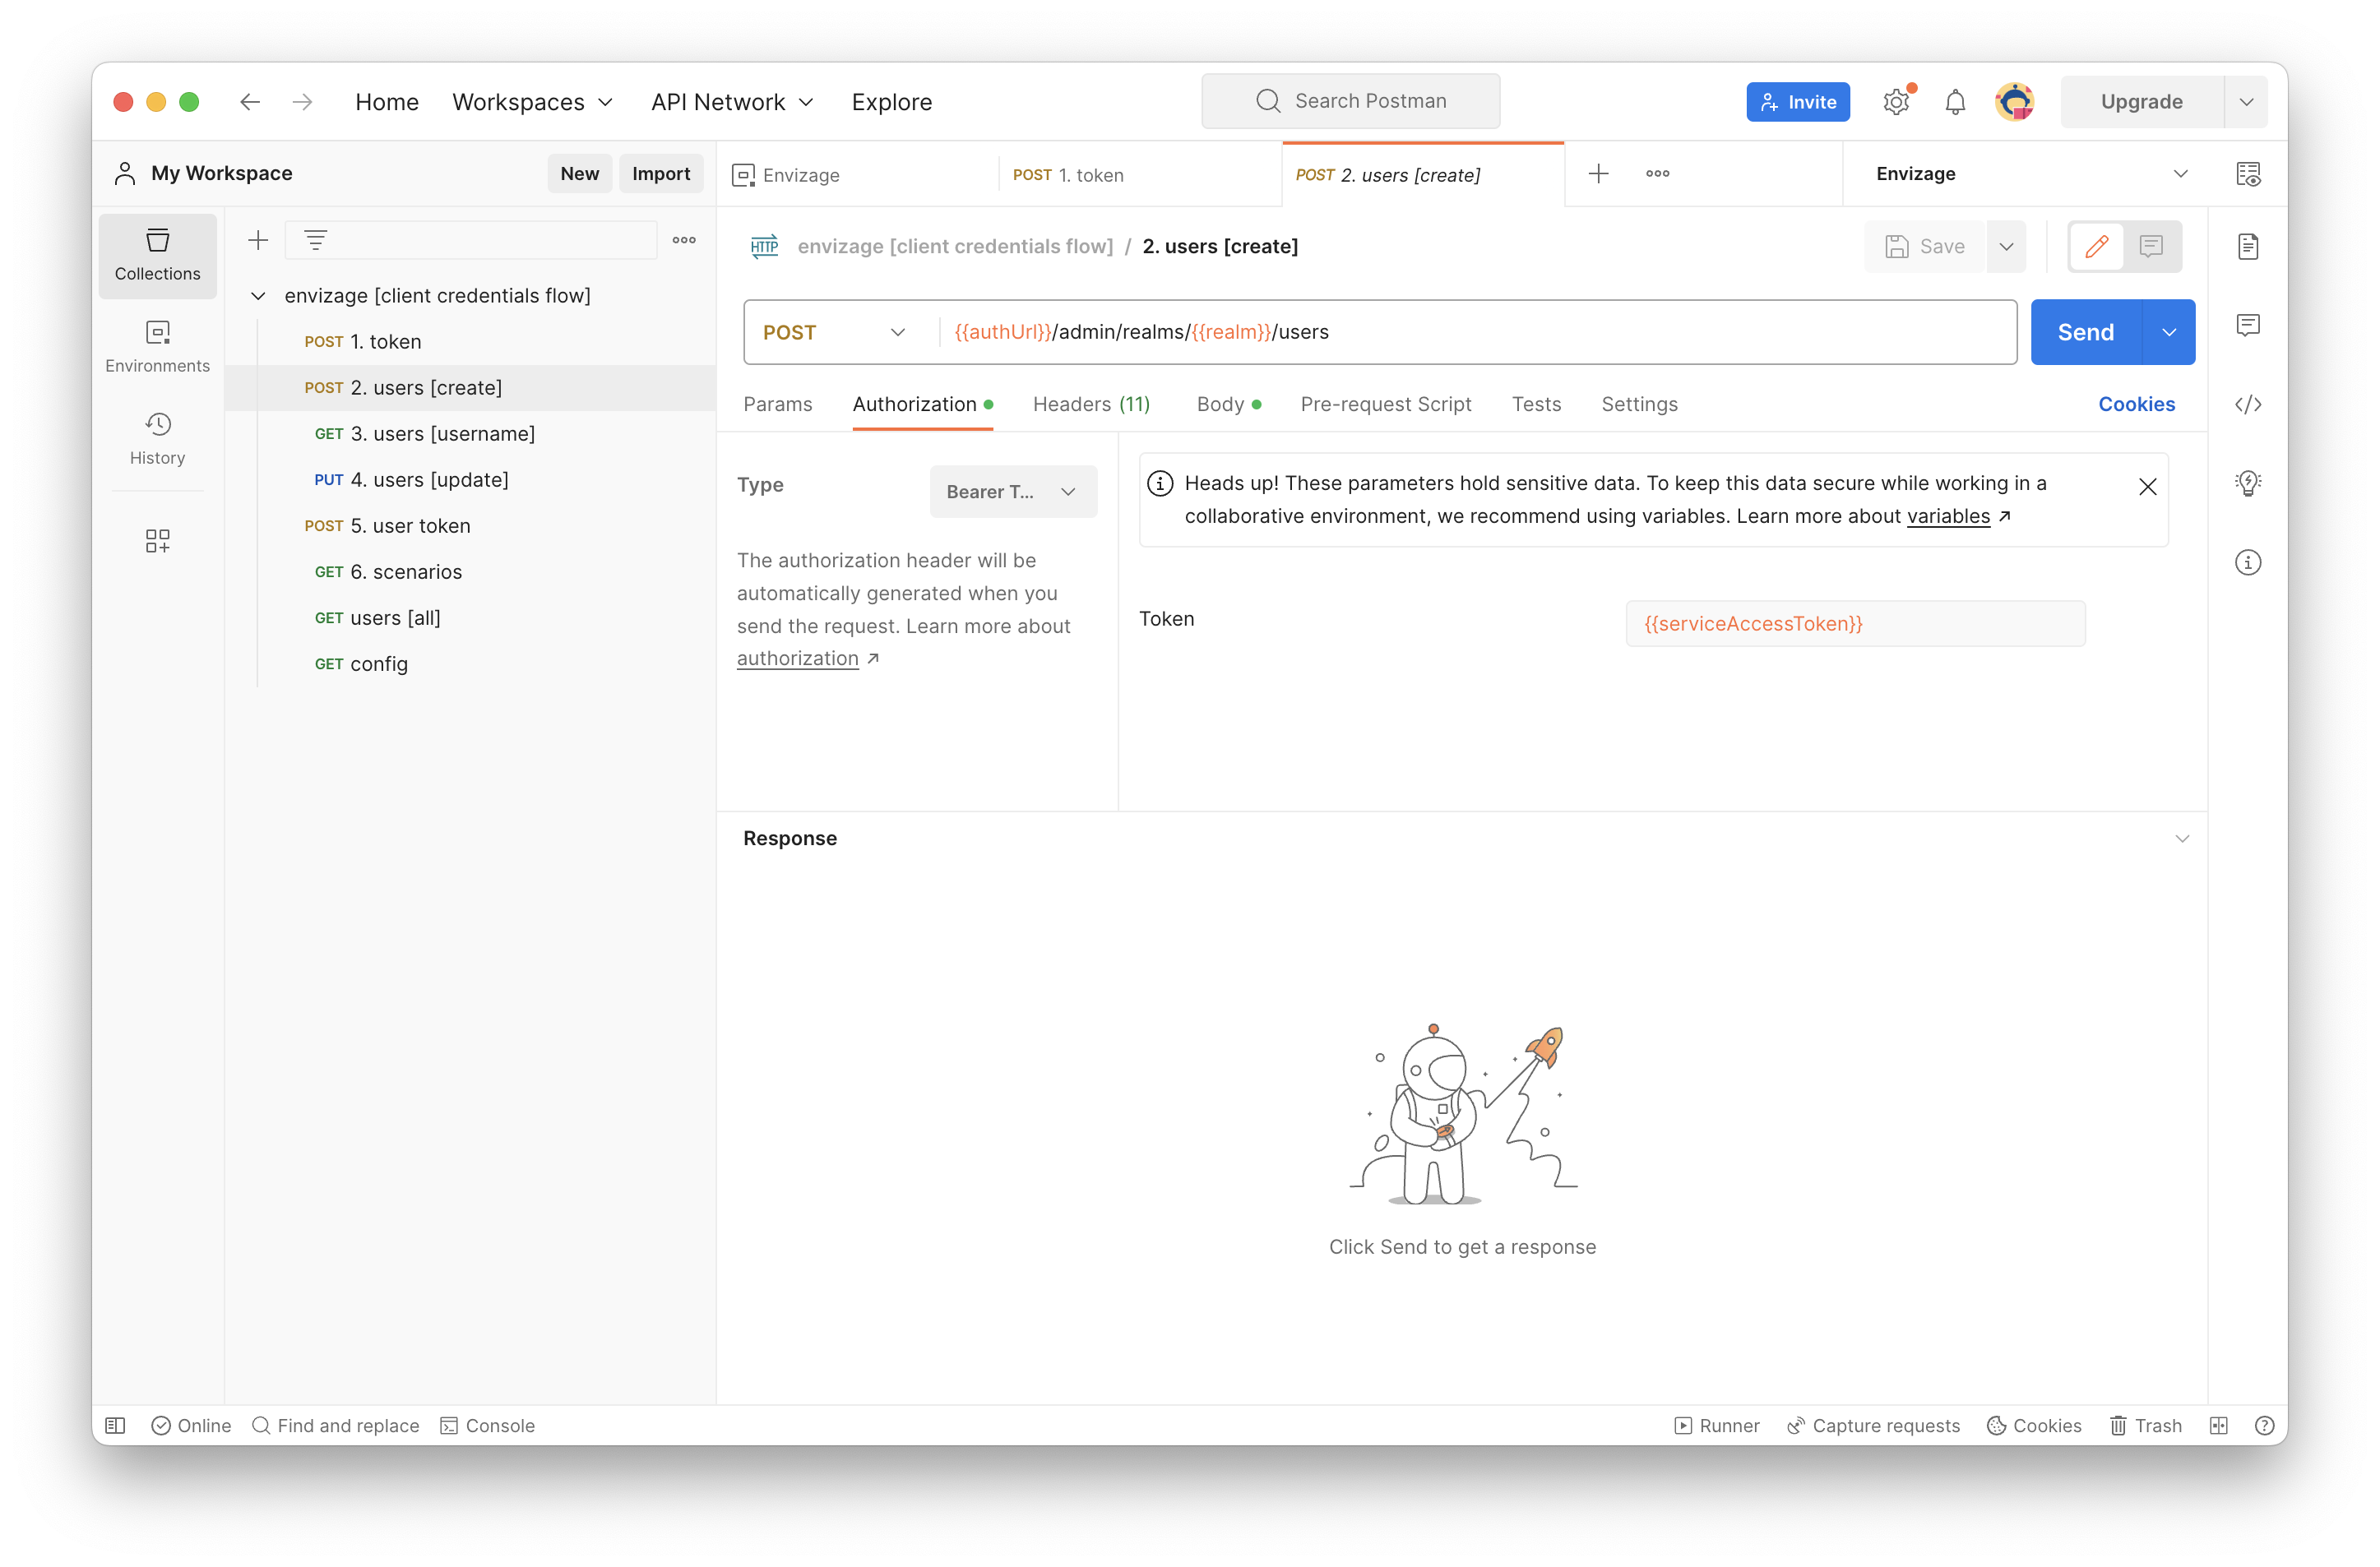
Pass user's mandatory data such as username, password and email in request's body. In case you set emailVerified property to false, two more requests are needed in order to update this value to true. In the following example, emailVerified has been set to false, thus the next two requests are used to update this value.
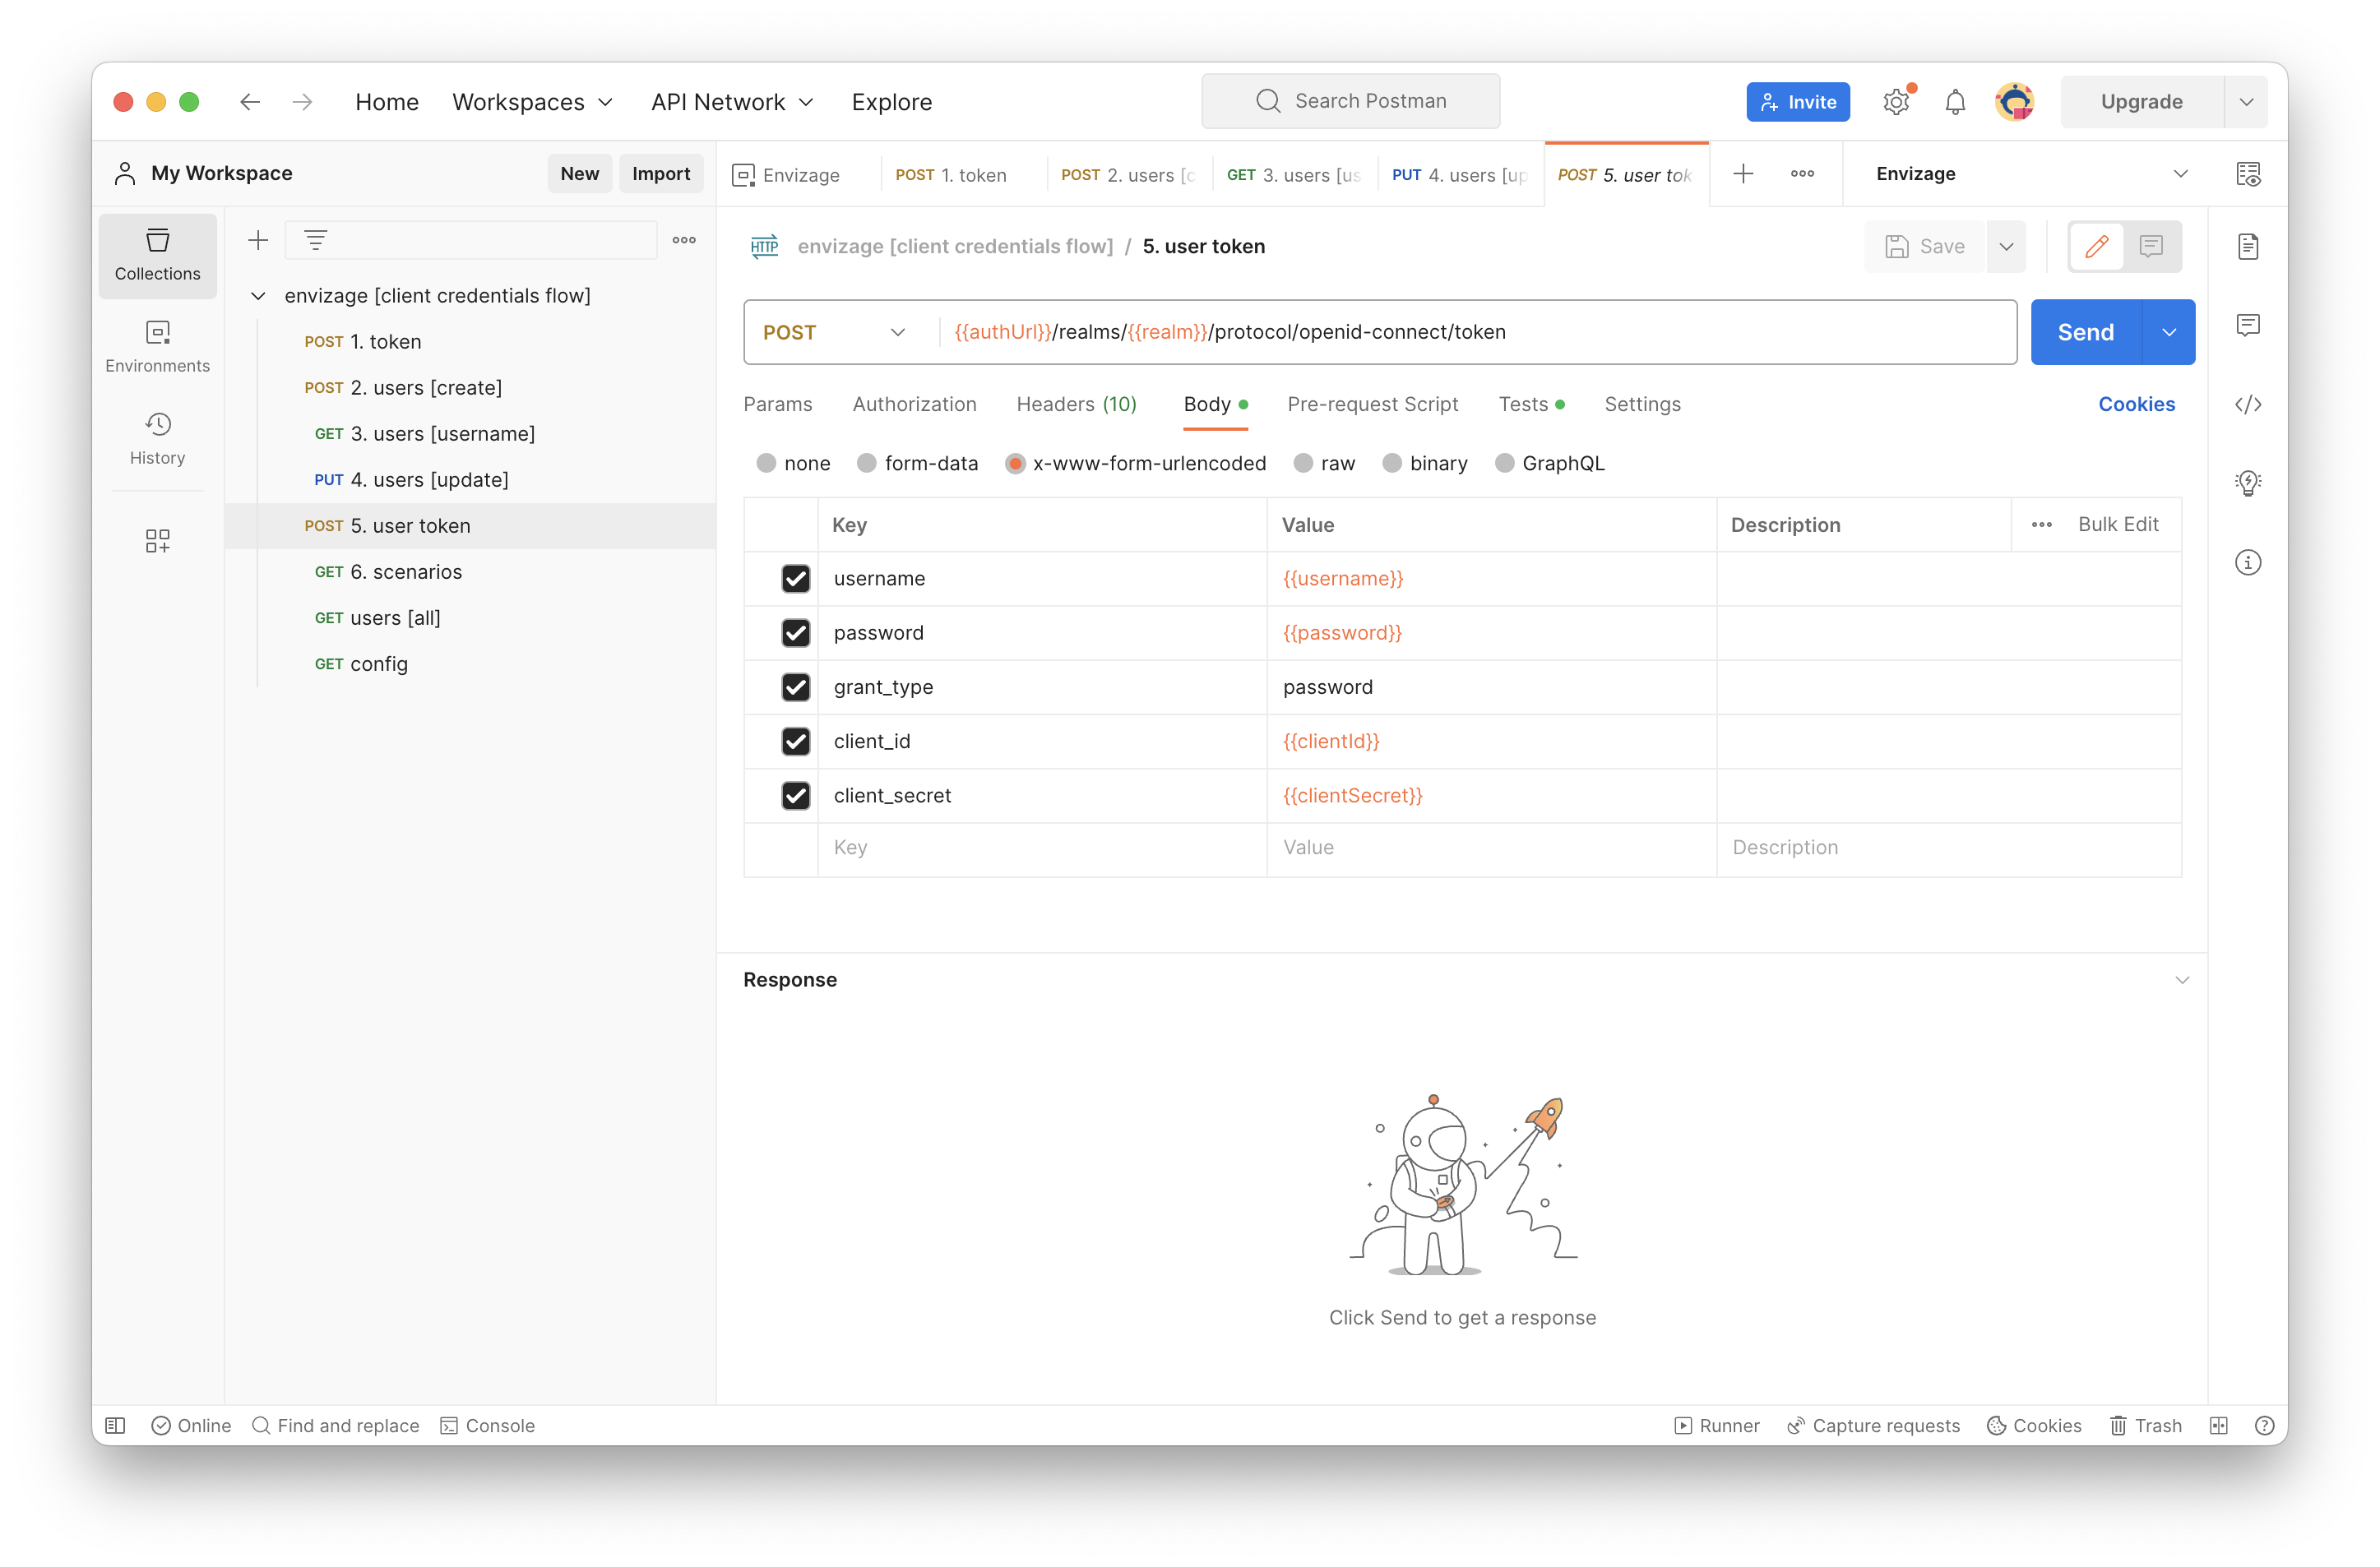
The last step before start using the Envizage APIs is to obtain the user access token. To do that, you have to execute the fifth request named "Get Access Token".
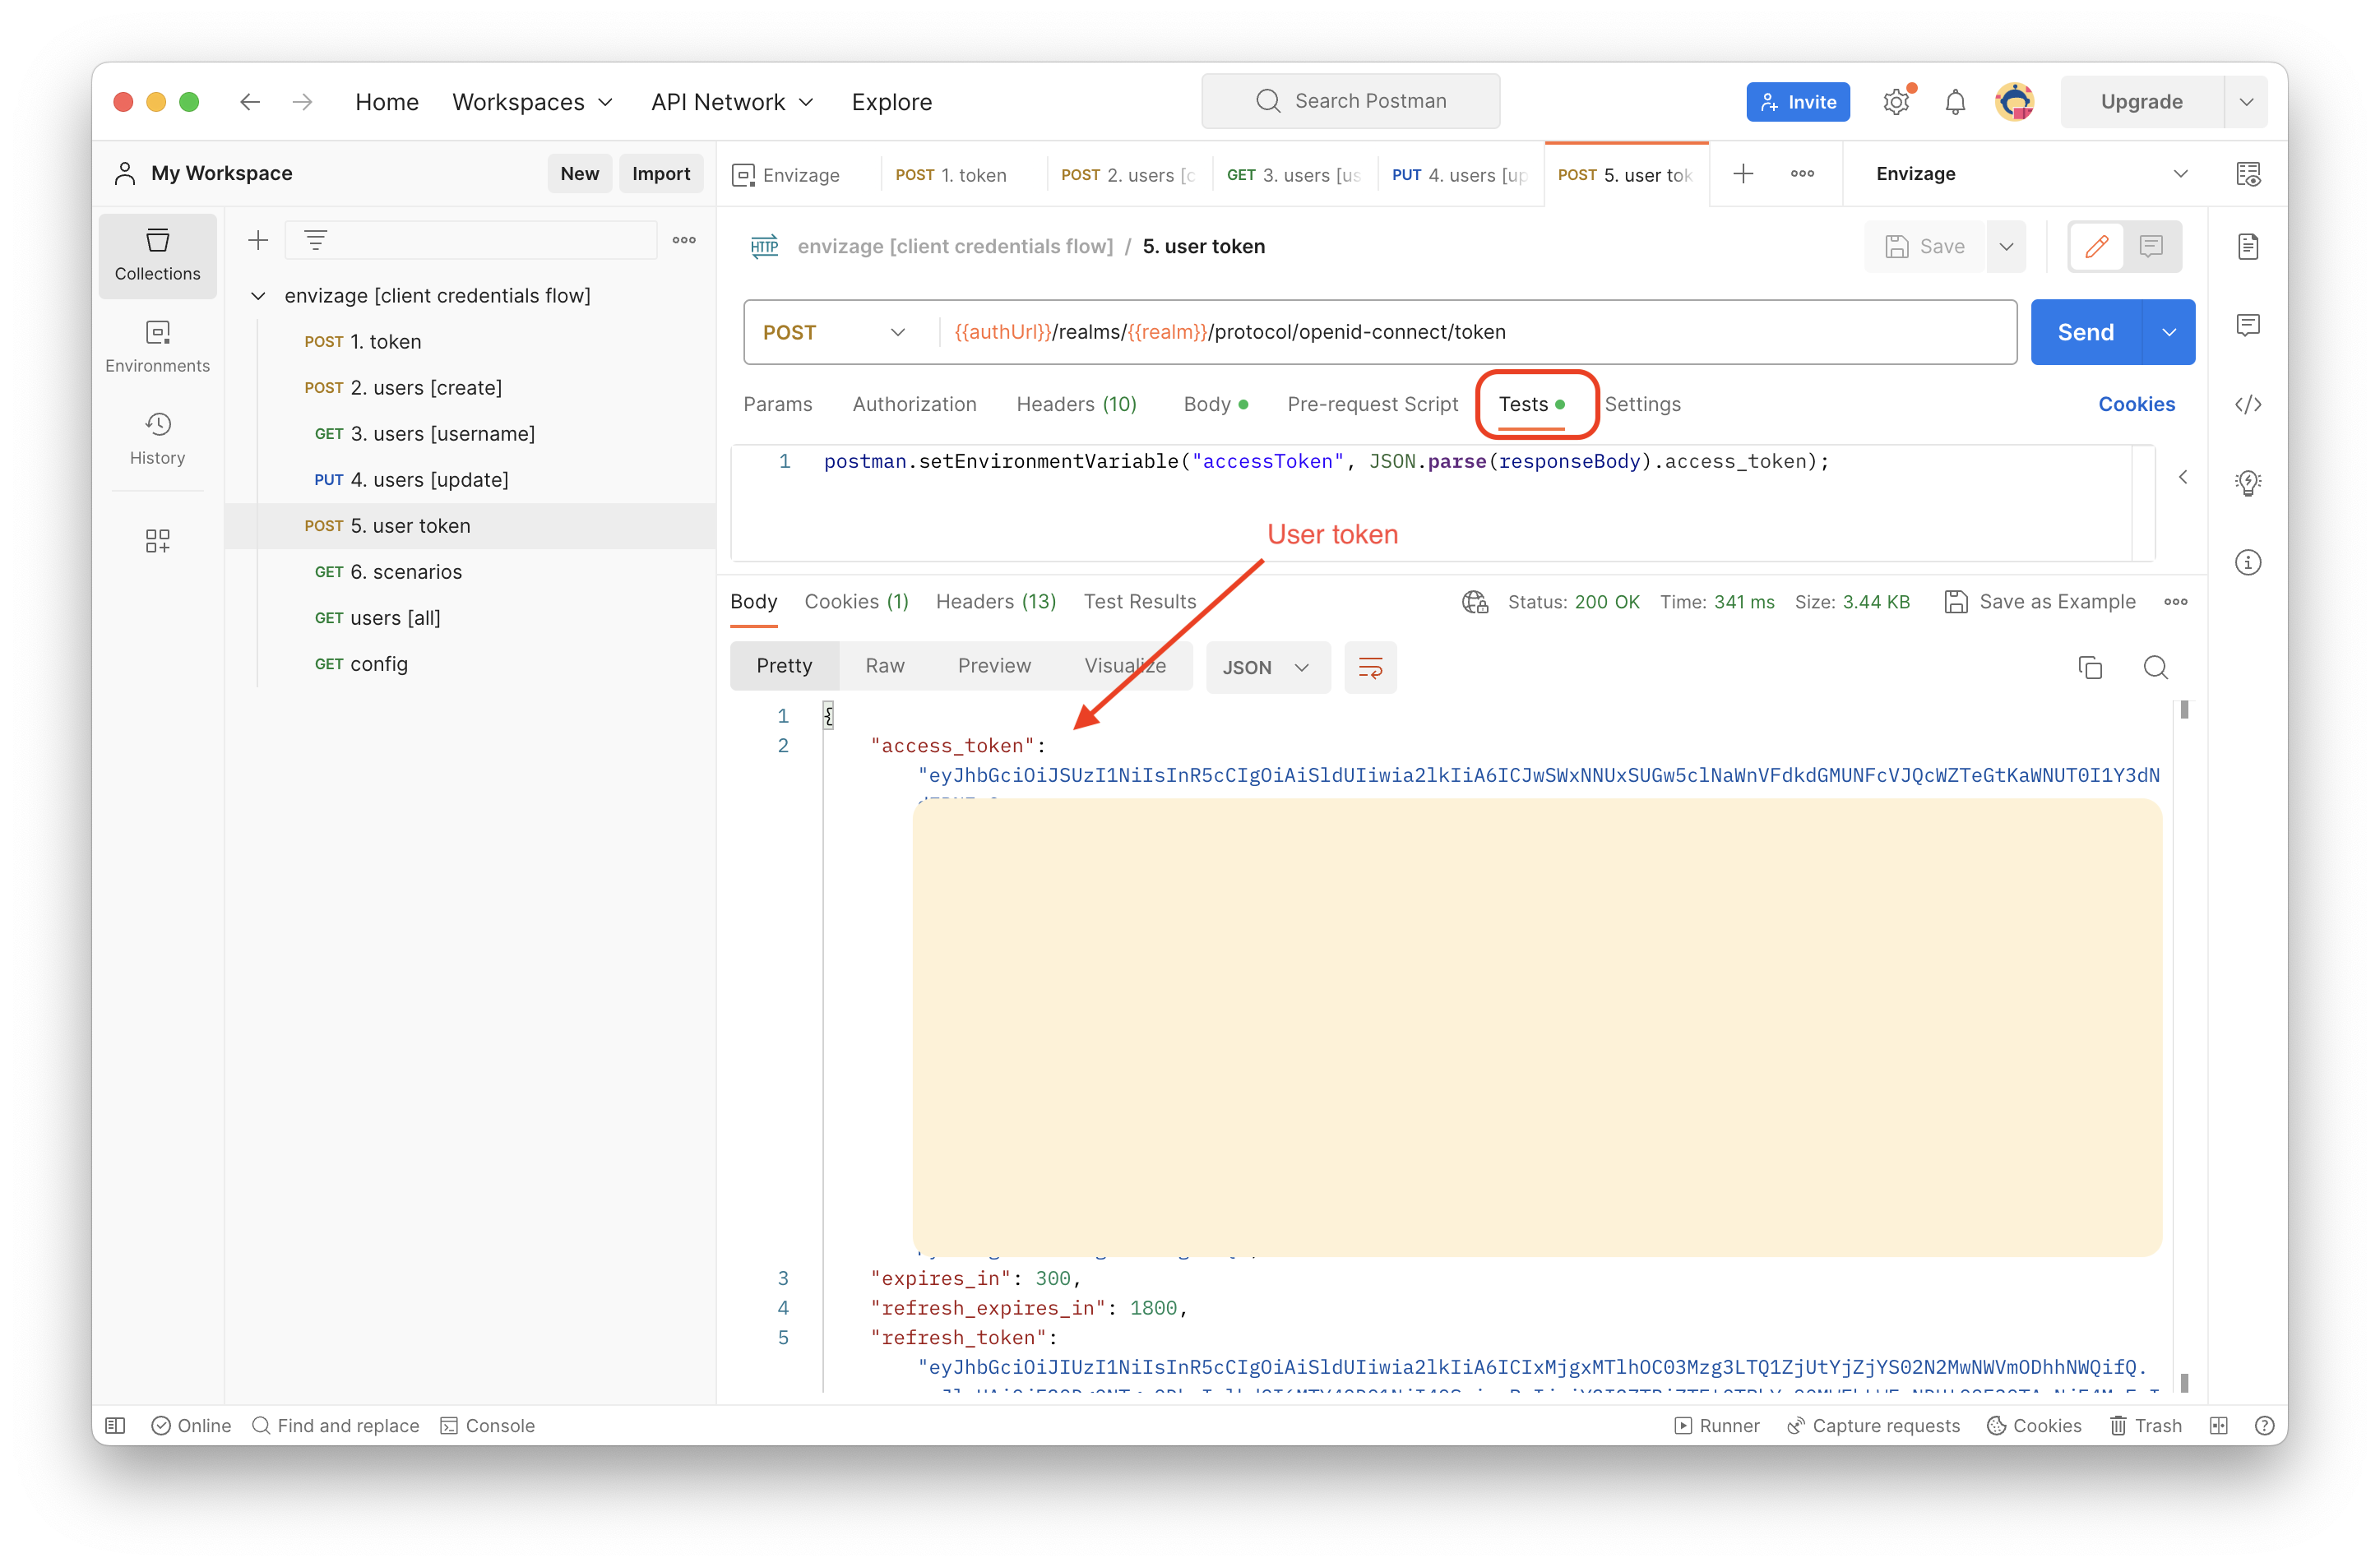
The snippet below extracts the access token from the result body of the request, and saves it under the variable name “accessToken”. This variable should be used in the Authorization header of every request that communicates with Envizage API.
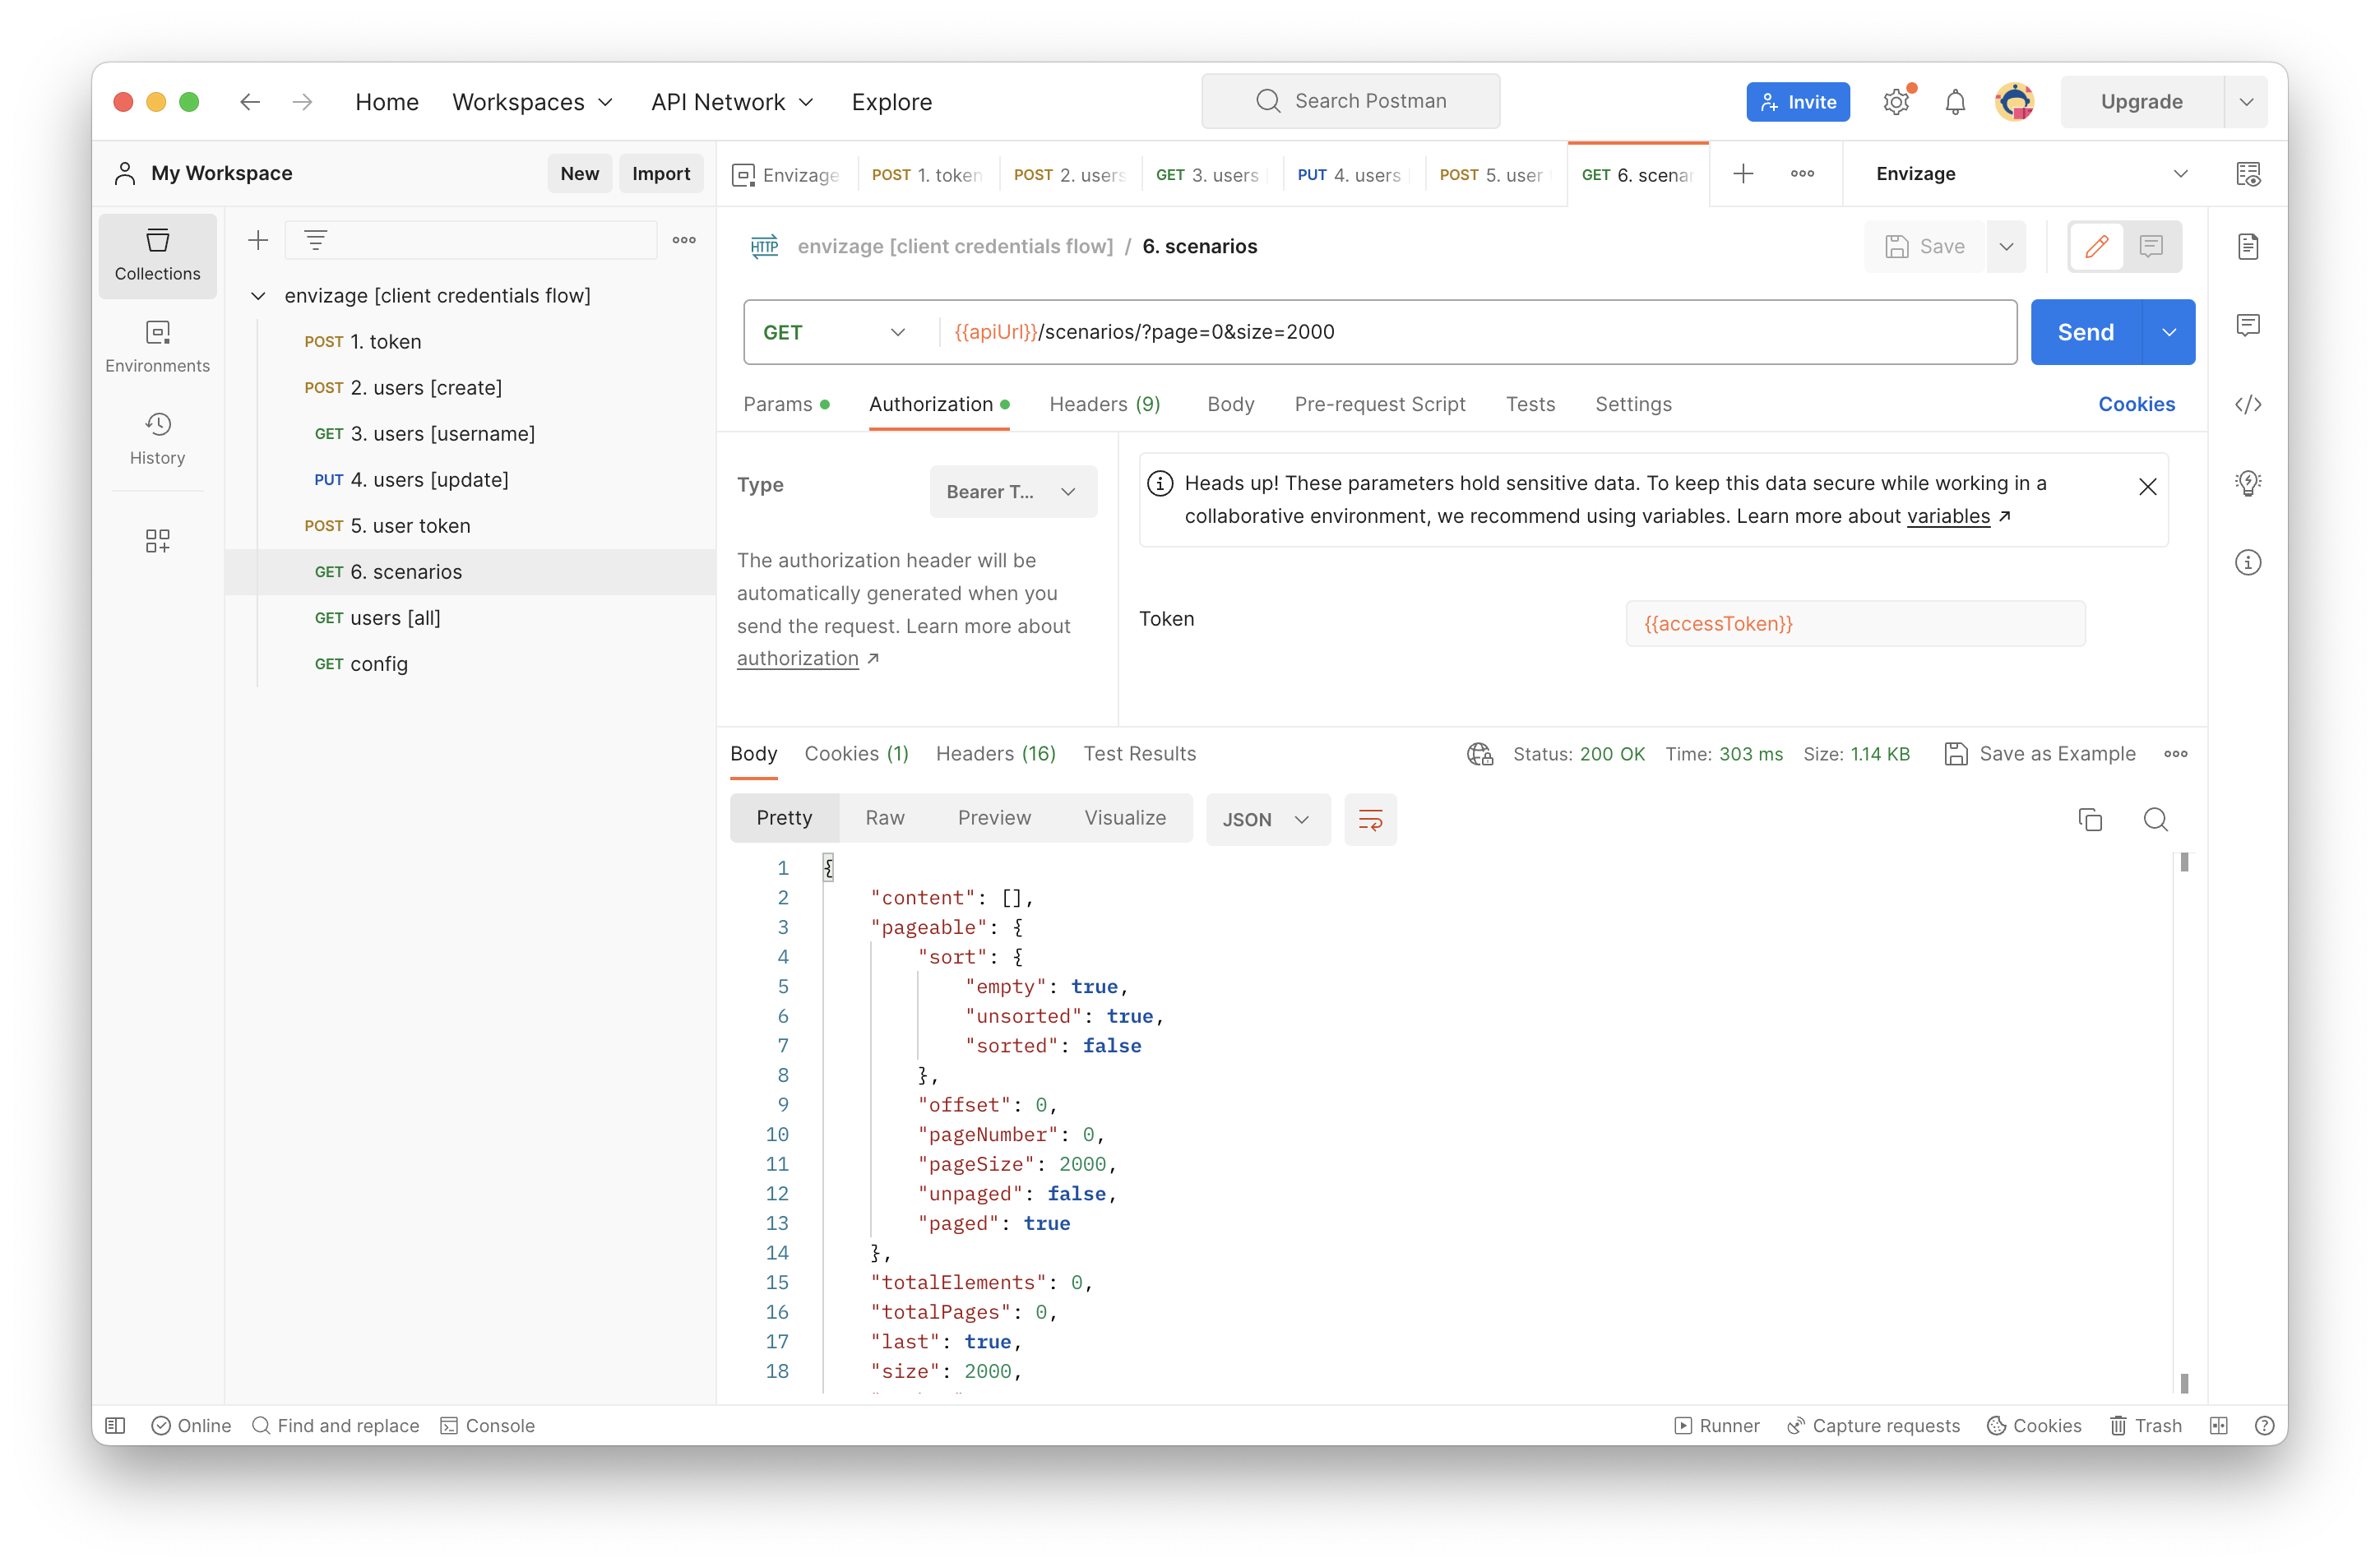
Step 4: Make a first call to retrieve all scenarios
Following the client credentials flow as described in step 3 and having the user access token, you can start using the Envizage API. By successfully executing the request named "Get All Scenarios", you can retrieve all scenarios.
Each end-point is documented individually in the API Reference section.
You can visit the Example Use Cases section for downloadable Postman work flows